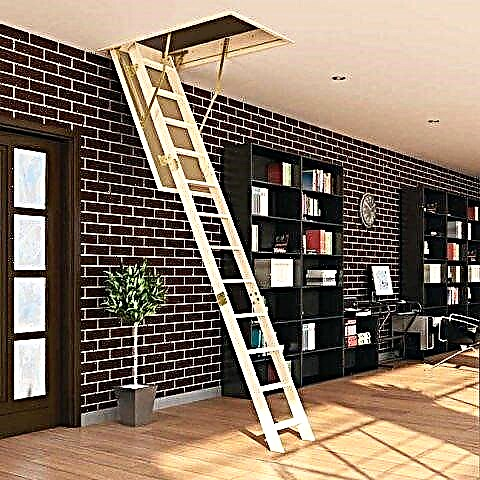
It's nice when there is a greenhouse created in the country at home. And the point is not so much in saving money, but in the fact that we are building for ourselves and with love. Therefore, greenhouse tomatoes, cucumbers and other vegetables seem to us especially delicious. But sometimes the desire to build a greenhouse makes a summer resident think. Where to put it? What material to build? Which greenhouse is better? And a host of other questions arise when we plan such a grandiose affair))
How to build a greenhouse with your own hands
Let's start by looking at what kind of greenhouses are, and then I will tell you how to build a greenhouse with my own hands in one weekend.
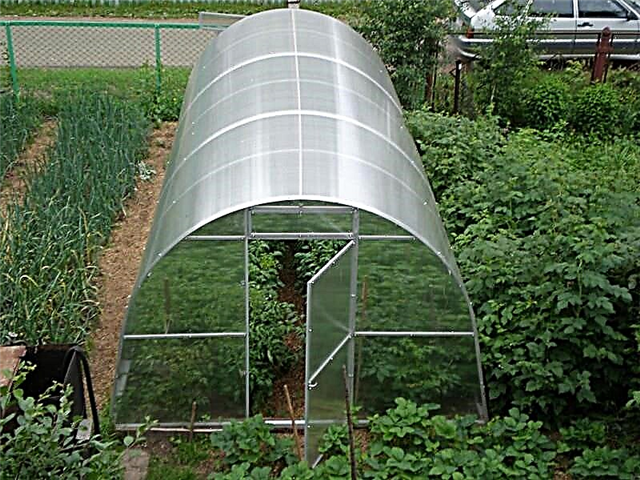
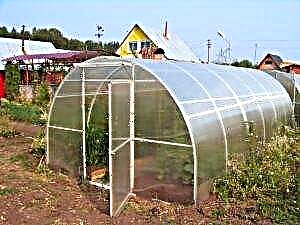
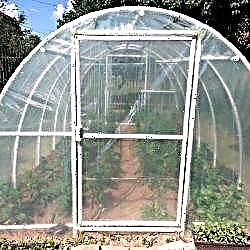
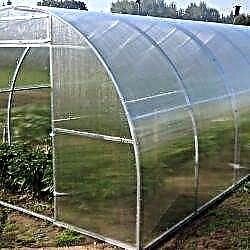
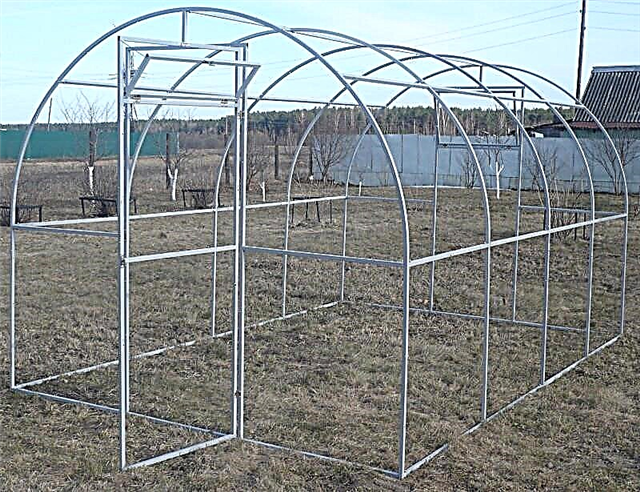
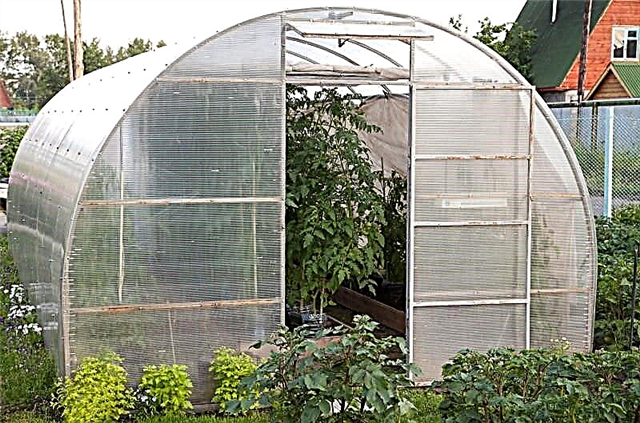
Arched greenhouses
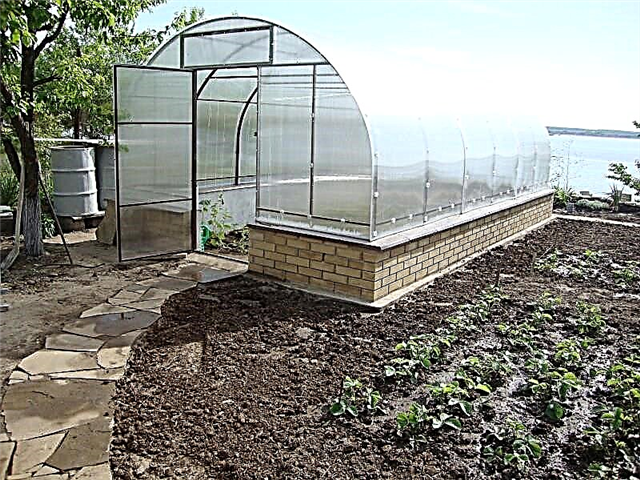
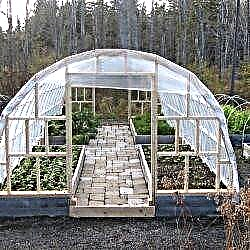
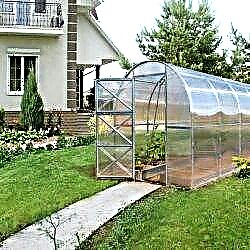
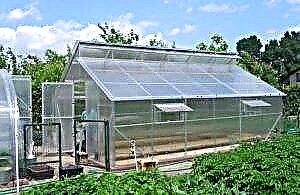
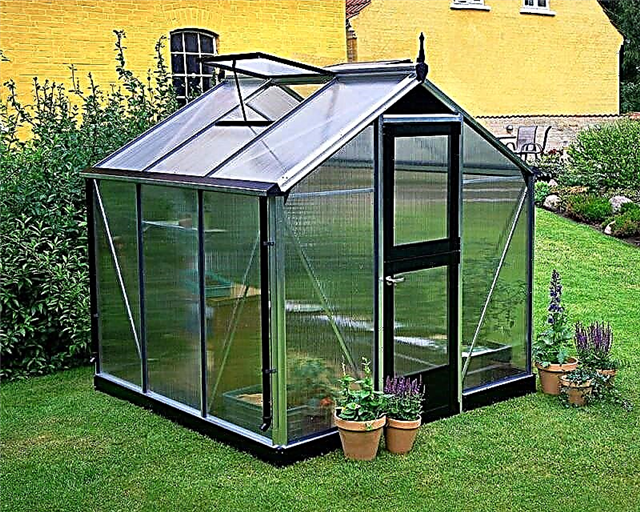
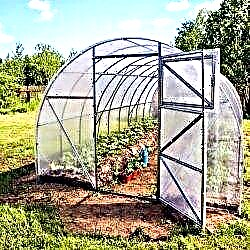
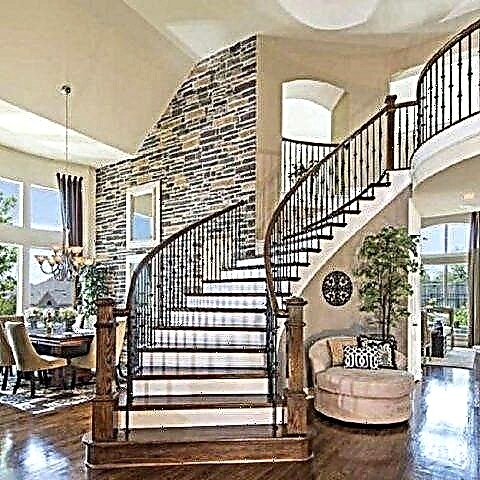
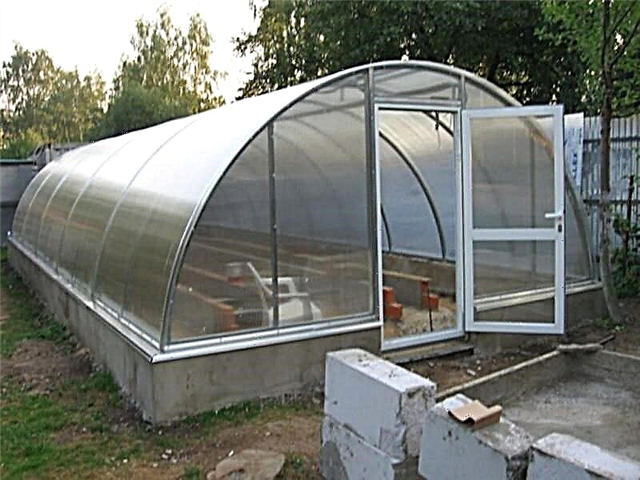
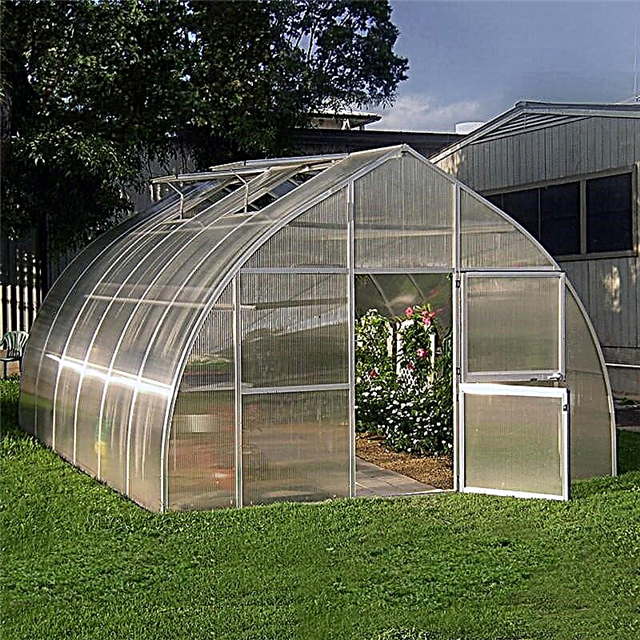
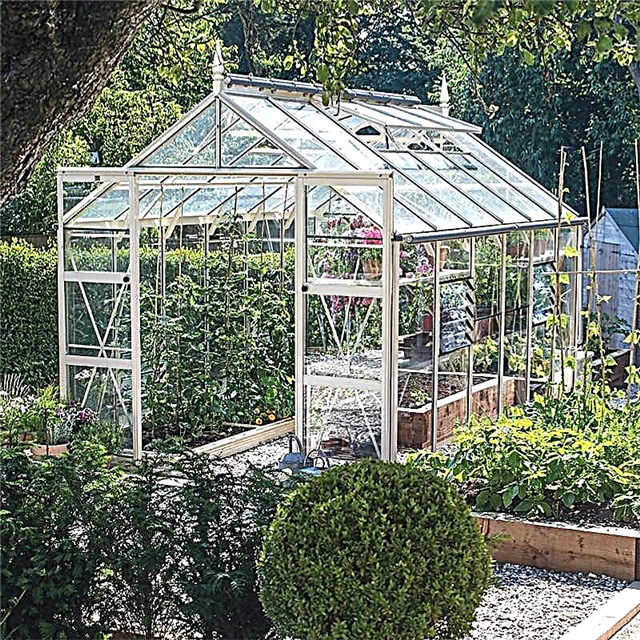
The arched greenhouse has an arc-shaped roof, so plants get more light because the sun's rays scatter along the arched surface, giving our carefully nourished green breadwinners light and heat.
Arched greenhouse
And in winter, snow does not accumulate on such a roof - accordingly, your greenhouse is not threatened by deformation or destruction (unless, of course, you carefully strengthened its frame and foundation).
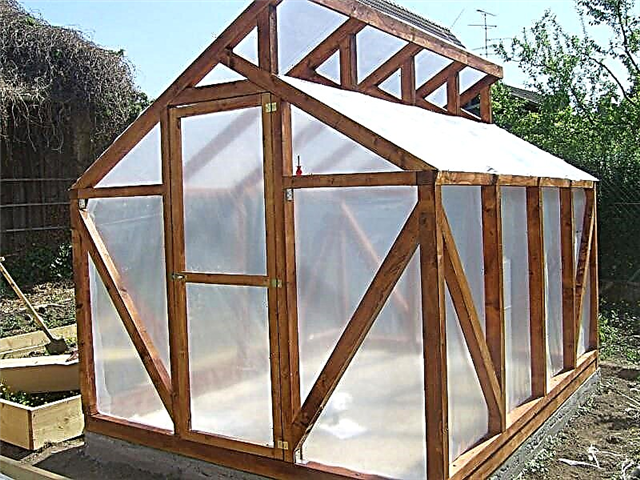
Design Features
Self-made greenhouse, embodied in reality, occupies an important place in the summer cottage area. A self-made greenhouse does not mean that by its functionality it will be less effective.
Photos and drawings of greenhouses for making do-it-yourself, you can see and study on thematic sites. The design of the greenhouse, its shape, will depend on the purpose of the object.
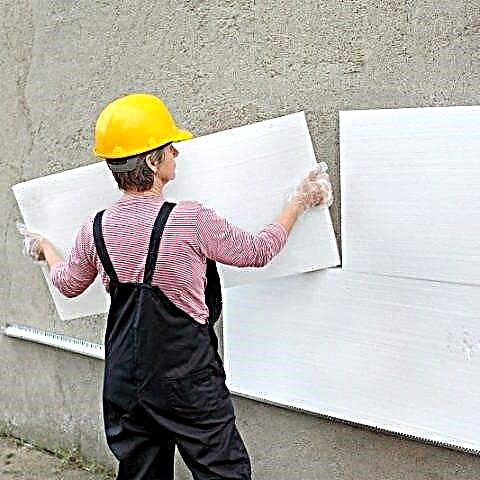
The most popular materials for building greenhouses is a fiberglass or galvanized metal profile pipe, which performs the supporting role of the structure. As a coating can be used glass, polyethylene film, polycarbonate.
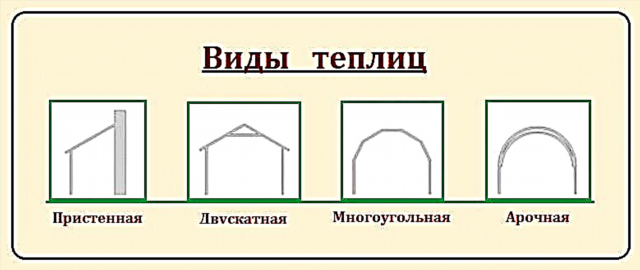
What types of greenhouses are
Materials such as polycarbonate, glass, and polyethylene film are used to cover facilities for growing plants.
The frame of the greenhouse is mainly made of metal profiles or wood, and can also use polymer pipes.
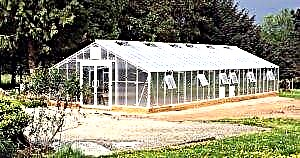
Depending on the type of construction, greenhouse constructions are of the following types: arched, gable, and gable. The greenhouse is most often installed as a separate building, but an extension to the neighboring building can be done.
Greenhouses are divided into winter and summer. In most cases, a winter greenhouse is a greenhouse.
In order to grow seedlings for flowers or early vegetables, summer residents for the construction of greenhouses use a frame made of metal, wood or plastic pipes. And depending on the preference for thickness, cover with a plastic film. To save the film for any season, it is recommended to remove it for the summer period of time. The film can not be removed if it is made of reinforced film.
If the cottage is equipped with an all-weather greenhouse, then it must also be equipped with additional systems such as climate control sensors, heating, watering systems, and ventilation must also be installed.
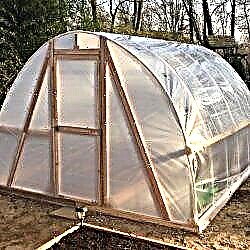
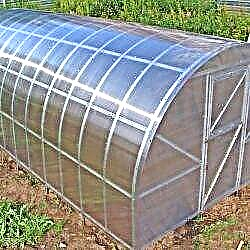
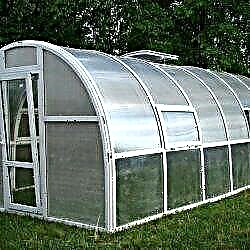
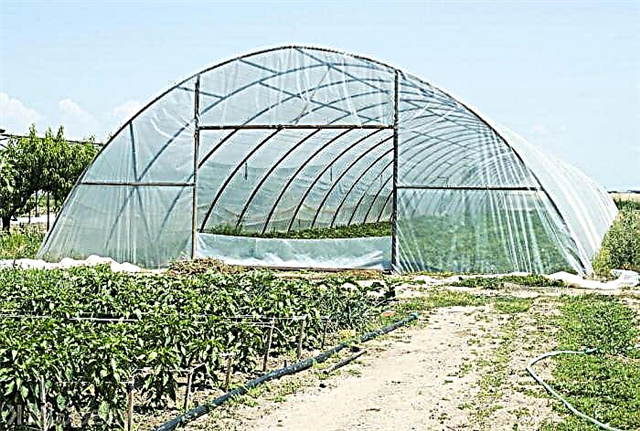
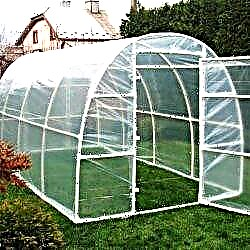
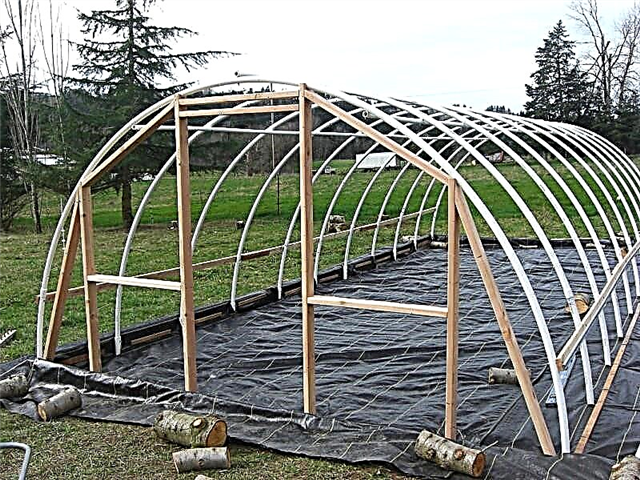
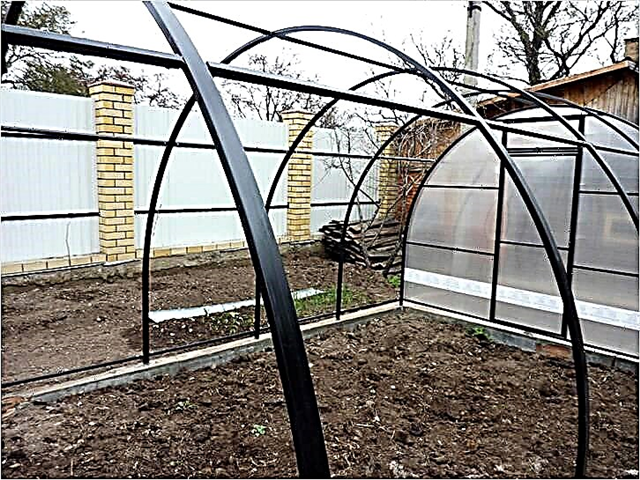
DIY arched summer greenhouse
Consider how this type of greenhouse is built. In order for this building to be made quickly and efficiently, you need to prepare material for it in advance. It is recommended to use a metal profile of a U-shaped form. To do this, you first mark the shelves on the frame, and then oppress at your discretion. After that, you will need a food film, the remains of corners, thick reinforcement, edged board.
To build a support for attaching a greenhouse or a greenhouse, trimming from metal pipes is used.To do this, first mark the place where the building will be installed. After that, pipe sections are driven into the ground, with a margin of about 30 cm above the ground.
There is no big difference between a greenhouse and a greenhouse. They differ from each other only in size. Greenhouses in height are a maximum of one meter. Greenhouses can be of various sizes, depending on how and for what it will be used.
After the supports are installed, metal elements that are bent in advance are attached. To make the frame more durable, the arcs are fastened with longitudinal rigid material. As such a material, a metal profile or reinforcing bar is usually used. It is attached to each arc. Planks are laid along the entire greenhouse; they will be between the beds. Then the film is stretched to the finished frame. It is recommended to fix it additionally with something heavy, so that with a strong wind it does not tear off the greenhouse.
Attached greenhouse and thermos greenhouse
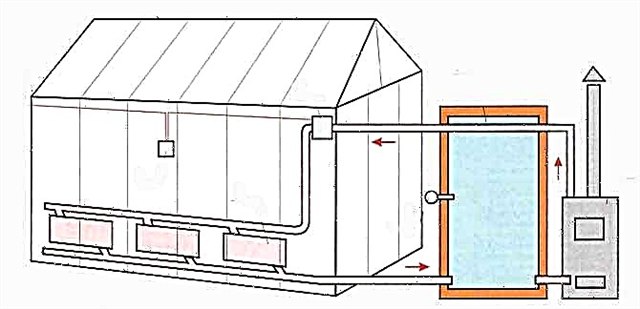
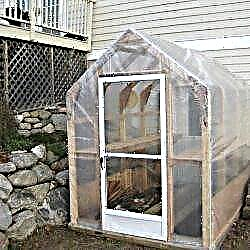
Who has a limited amount of space in the country, it is logical to use an attached greenhouse. Since one side will be the side of the house, the temperature in the greenhouse will be much higher, and accordingly the plants will grow faster.
Such types of greenhouses can also be used as a greenhouse. To do this, it is recommended to install it on the southwestern or southern wall of the house. Due to this, a lot of daylight will come into the greenhouse and with it heat.
Another plus of the attached greenhouse is the simplicity of conducting heating and electricity there. The rest of the structure can be made of materials such as glass, polycarbonate or a special film.
A distinctive feature of the greenhouse - a thermos is that it is installed almost completely in the ground. First, digging a pit with a depth of about two meters. Then the foundation is made. After this, walls are built. Wall material can also be selected. It is better to use wood, brick or foam blocks. As a result, it turns out that only a small part of the roof will protrude above the ground. The roof can be made of the same materials as conventional ground greenhouses: polycarbonate, film or glass. So that the snow does not settle on the roof, it must be made gable.
In winter, the earth does not freeze at such a depth, so you can not install additional equipment in the thermos thermos to keep the temperature at a constant level. If you cover the roof with a special reflective film, then this will give you the opportunity to collect and transform solar heat.
DIY greenhouse
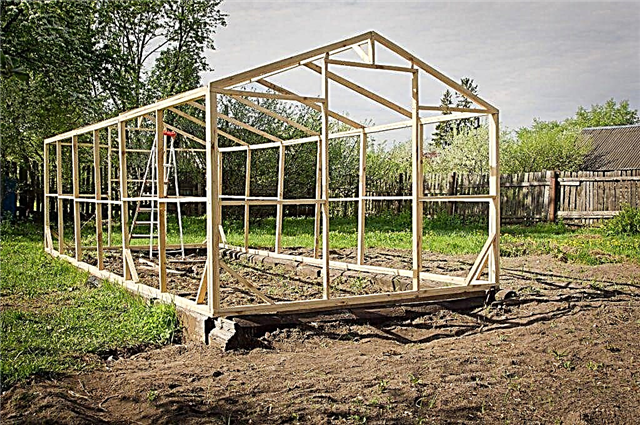
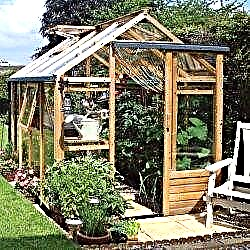
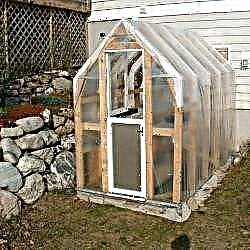
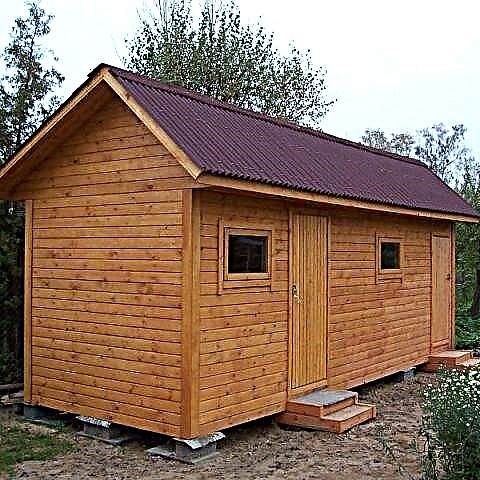
Many summer residents believe that the arched greenhouse is unstable. And then some of them decide to build a frame of wood. In order to build a wooden greenhouse, a number of conditions must be observed. The durability of such a greenhouse will be ensured if a good foundation is made for it. Against rotting a wooden frame, you need to treat it with an antiseptic.
A wooden greenhouse is also chosen for the reason that it can be built by almost anyone without special skills. Woodwork is much simpler than, for example, metal work. When using metal as a framework, basic knowledge of plumbing and a welder is needed. To protect the greenhouse from freezing, it is recommended to use a strip foundation. It will be more reliable and additionally protected.
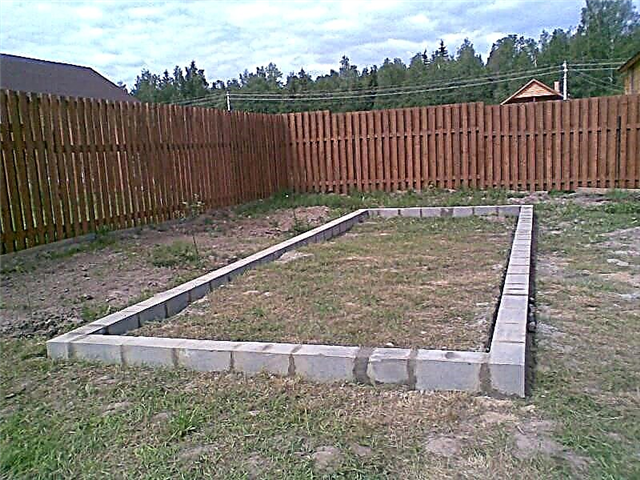
Foundation making
The first step in building a greenhouse is to make a foundation. To do this, dig a trench around the perimeter of the greenhouse. Depth is about 20 cm and width is about 30 cm. Pegs are installed along the entire length of the trench, to which the formwork boards are nailed. After that, a framework of reinforcement with diameters of about 10 mm is installed in the formwork. It is believed that this diameter is well suited for the manufacture of the frame. Parts of the frame are fastened with wire and then welded.When the frame is made, concrete is poured into the formwork along the entire perimeter of the trench.
To fill the entire void with concrete, you need to use a vibrator, if it is not there, then you can perform punctures in a spiral from the edges to the center, for air bubbles to escape from the solution. The concrete mix becomes strong after 3 weeks. However, if the street temperature is high, it is recommended to put the film on top of the solution.
How to make a wood frame
If you lay roofing material on top of the foundation, then the wooden frame will last much longer. Next, the tree is strapped. To make it, you need a bar 10 by 20 cm section. Its lower part is attached with screws to the foundation. Then all this is combined with metal plates.
Then, vertical racks are installed to the lower trim around the entire perimeter at a distance of 75 cm from each other. The upper part of the vertical structure is fastened with a wooden trim. For reliability, it is recommended to install struts and struts.
A wooden greenhouse, as well as a thermos greenhouse, is covered with a gable roof. In winter, snow will not accumulate, and the roof will not bend under its weight. The gable roof is easier to install. To attach the material (glass, polycarbonate or film), you will need a rafter. It is quite simple to make them yourself from wood. You will need a bar with a section of 10 by 4 or the same board. The structure is assembled on the ground, and then already installed up the greenhouse.
First, a structure is made of two beams, like the letter "A". And only then identical schemes are gradually attached to it. Then they are all joined together by skate boards. These boards are attached on both sides of the roof. The rafters are sheathed with a crate on which the roof material is attached.
Roofing material
Why do many people make greenhouses themselves? Most will answer that it is much cheaper. And it really is. The advantage of making yourself is that you are your own designer. Choose your own size, shape, material, type of greenhouse. You also do the internal filling of the greenhouse, as you prefer. And if you include ingenuity and engineering skills, then you can do autowatering and ventilation.
With self-construction, you choose the material of the greenhouse. Depending on the purposes for which the greenhouse is installed, the material is selected accordingly. In order to grow vegetables and seedlings, you can use a film. Polycarbonate or glass is needed if you want a smart greenhouse. And in this case, vegetables and flowers will always be on your table.
Varieties of greenhouses
Everyone knows that the harvest of fruits and vegetables is many times greater than the harvest just in the ground. But not everyone has the opportunity to purchase. Therefore, manufacturing independently from the film and wood of the greenhouse is a very cost-effective step.
A film is used as a material, since it does not need to additionally produce a foundation. The plus in the film is that it is transparent.
Framed greenhouse with wooden frame
First, take the bars pre-soaked in antiseptic and dried. Cross section approximately 50 mm. The concrete base is made first. First, a trench drips, sand is laid at the bottom and poured with water. After some time, the trench is poured with a solution of cement. It is better to observe the following proportions by analogy: 10 buckets of gravel, 6 buckets of sand and 2 buckets of cement mortar.
Next, racks are made. They need to make 6 pieces. 4 pieces on the sides, about 2 m high, and 2 for doors. To correctly make the bars, they are placed on a flat surface, perform the necessary measurements, and only then are attached to the base with self-tapping screws or corners with nails. Using a plumb line we measure the level.
A ridge beam is used in the upper part of the greenhouse. Fastens with nails. Then everything is covered with polyethylene.Cover the film with a small margin so that you can correct it later. Then the rail is fastened with nails to the beam.
Do-it-yourself greenhouse with a metal frame
As a base, such greenhouses use arches made of metal, with a diameter of 30 mm, approximately. You can also take tarry timber, a metal corner or a railroad tie, for example. Holes are drilled in the tree, with a depth of 10 cm every 150 cm for arches.
Side mounted rails - runs. Above are connected by a ridge rail. Staples are boiled from the inside, slats are inserted into them and compressed by bolts.
Diagram of a gable greenhouse made of frames
The scheme is the same as for an ordinary greenhouse with two frames. The only difference is that the rafters are attached to the top.
To do this, we take rails, one side is the skate, the second is the top of the structure. After bonding, the excess slats are sawn off.
In a wooden beam, holes are made for attaching the frame with nails. Part of the frame will be the side walls of the greenhouse, and the rest are mounted on hinges, like doors.
The greenhouses that we are currently considering are summer. They grow various vegetables, fruits, flowers for warm months, so that there is sunshine and light. There are still winter greenhouses, they have a more complex structure, but they also have more functions.
Gable winter greenhouse with greenhouse frames
In this design, a gable winter greenhouse, polyethylene or glass is used as side walls.
Approximately at a height of 40 cm, a foundation is laid in a section of 40 by 40. Next, there is brickwork. Bars are placed on the brick, in which holes for the frames have already been made. The bars are pre-treated with resin.
Bars with a diameter of 10 cm will serve as rafters. They connect the ridge beam and the wall beam.
Then you can do the interior decoration of the greenhouse. For example, you can put racks. To circulate the air well, leave a small hole between the rack and the wall. Rack board sheathed areas between the frames.
Greenhouse single-pitch winter greenhouse
So that the corridor inside the greenhouse was about 80 cm, you need to make a pit in the following sizes:
- depth 85 centimeters,
- length 11 meters
- width is 3.5 meters.
In that case, if the frame is wooden, then the lower part of the timber should be treated with an antiseptic. Installation of such a greenhouse is no different from a double-pitch. To use the stove chimney as efficiently as possible, install 10 frames.
There are several recommendations:
- There must be ventilation in the greenhouse.
- Entrance must be from the east or west side.
- As a material for the ceiling take roofing material, boards.
- The entrance to the greenhouse must be further fenced.
- At the end of construction, metal materials must be coated with paint.
Beginners in the construction of greenhouses can first try to make a pent greenhouse or a greenhouse. The main difference between the greenhouse and the greenhouse is that the ventilation of plants occurs due to the disclosure of part of the greenhouse. The greenhouse is easier to use, it can be disassembled at any time, moved to another place. It should only be borne in mind that low plants can be planted in a greenhouse. Most gardeners use a greenhouse for growing seedlings. Simply put, a greenhouse is a miniature greenhouse.
Film pitched greenhouse
Let's start with the dimensions of the pit. Width about one and a half meters, depth up to half a meter, bottom about half a meter. Logs are stacked along the north and south walls. To ensure that the frames do not slip, a groove is made on the south side or the bars are additionally nailed. The width of the greenhouse is set with frames with a film with an area of 1 meter by 1.5 m. And depending on how many frames there will be, such will be the length of the greenhouse. To connect the frames, you can use welding.
Gable film greenhouse
First, the box is made. Dimensions:
- Height - 20 cm.
- Width - 1.6 meters.
Rafters are nailed to the sides every 3-5 cm.On top, everything is connected by a bar, it also forms a skate. The height will be about 75 cm. Each gardener can make such a miniature greenhouse. It is very fast and does not require large investments.
Rules for placing greenhouses and greenhouses
The place to install the greenhouse or the greenhouse must be chosen correctly. There should be plenty of sunlight and no wind should come from the north. The best option would be a small area in the southern part of your site.
It is imperative to pay attention to the condition of your soil. If the soil contains a lot of clay or a lot of moisture in it, then such land cannot be used for a greenhouse or greenhouse. The best option would be the soil, which is processed in advance from pests and diseases.
Home-made winter greenhouse: types and applications of materials
Let's look at how to make a winter greenhouse with our own hands? Almost every site has a greenhouse or greenhouse. These designs can be purchased ready-made. In our article, we will consider how you can independently make a greenhouse, what materials may be needed and, in general, the types of structures.
Types of Greenhouses
One of the main advantages of homemade greenhouses is that you are your own designer and you can think through and choose the design you need.
But before you begin to build, you need to carefully consider a number of details.
- Select material.
- Think over the irrigation system.
- Do you need a foundation?
- Ventilation system.
- Sizes.
- Heating system.
- Frame type.
- Interior decoration.
- Workspace.
Addition. Designs, depending on the features, can be wall-mounted or stationary.
Characteristics of different types of structures
Before you build a greenhouse with your own hands, an obligatory step is to choose a construction model. If the greenhouse or the greenhouse are adjacent to the house, they will be economical in space and in terms of heating costs.
Mostly solar heat is used as heating.
There are polygon greenhouses. They are distinguished by their uniqueness and complexity in manufacturing. Accordingly, prices for such designs are higher. But you will have a beautifully decorated garden.
Dimensions of structures
Before you start building a greenhouse, you need to understand what size it will be. In this case, it will be necessary to take into account the area of the site, and the size of the proposed place for the greenhouse.
Consider what you need to consider when choosing a size:
- If you plan to grow only seedlings, then you can use the most minimal size.
- If the plant will be fully grown in the greenhouse, then a more voluminous design is needed.
- When choosing a size, you need to consider that the larger the area, the higher the cost of heating.
- The height of the structure directly depends on the height of the owner of this greenhouse and on the interior decoration (shelf).
Types of the bearing base for greenhouse structures:
- Bars of wood.
- Foam blocks.
- Brick.
- Concrete.
Recommendation. If you plan to use the greenhouse for no more than 7-8 years, then wooden bars can be used as the foundation. Concrete blocks or a monolith should be constructed in the presence of groundwater.
In most cases, homemade greenhouses are made from a wooden frame.
Materials for the greenhouse
An important quality of a tree is its environmental friendliness and thermal insulation, which is very important for seedlings. A negative feature of the use of wood is its tendency to rot. Therefore, now they prefer to use galvanized steel as the frame.
Frames are recommended to be made of aluminum, since it does not obscure the plants. Metal frames, in comparison with wooden, are much stronger and will last much longer.
Any beginner in this business will be able to independently assemble a metal frame. Just keep in mind that thermal insulation can be degraded.
Building a winter greenhouse: materials for construction
Before you start building a greenhouse, you must select the material. When choosing it, you need to focus on qualities such as strength, light transmission, and good thermal insulation.
Materials such as wood, glass, polycarbonate, metal arcs, polyethylene pipes have all of the above properties.
Consider the quality of materials:
Glass is environmentally friendly and translucent. Cons - it breaks easily and weighs a lot. And also for the price - this is not the most economical option. Glazing will require a lot of time.
Polycarbonate, as well as glass is environmentally friendly. It retains heat well and is resistant to mechanical damage. This is a very important characteristic, since the structure will not collapse under the influence of hail and stones. Its strength in comparison with glass exceeds 100 times. It is of two kinds: honeycombs and sheets. They differ from each other in the structure and manufacturing process.
Cellular polycarbonate has a higher light transmission, since its material and structure scatter light through the glass.
Sheet in its structure and characteristics similar to glass.
Distinctive features of summer from winter designs

Winter buildings are more complex in themselves, since during their construction it is necessary to think through heating and heat conduction systems. Many experienced gardeners recommend, or rather, believe that a polycarbonate greenhouse based on biofuel is the most optimal for winter time. When building a wall greenhouse, you can consider the option of joining the heating system of the whole house. It will also be beneficial from an economic point of view.
Greenhouse thermos: technology of construction
The main feature of this greenhouse is the huge savings in maintaining the temperature - utilities. Plants can be grown all year, and in the most severe and frosty winters. An excellent level of light penetration, which is not always the case in ordinary greenhouses.
The main features of this greenhouse:
The main advantage is that, starting from a depth of 2 meters, the soil maintains the same temperature constantly: in winter, and in summer, and in frosts, and in rains.
Note. There are small changes depending on the level of groundwater, the closer they are to the surface, the temperature fluctuations are more noticeable.
A good example is a well. In the well in summer and winter, a constant temperature is above zero.
Approximately at a depth of 1 meter, temperature differences are noticeable: in winter +5, and in summer to +10.
The base of the greenhouse can be heated to such temperatures with the help of a warm floor. And to maintain moisture in the air and soil it is necessary to use drip irrigation.
Note. A thermos greenhouse can be built in just one season, without using any special equipment and without high costs.
Digging a pit. Earthworks for the greenhouse
Since the greenhouse goes into the ground, its main part, you need to dig a hole, at least two meters. Only then will the soil not freeze, but will give off its heat.
The length of the underground part can be any number, and the width is limited - only 5 meters.
Note. You can do the width and more, but then the natural heating and reflective properties will be worse.
The form can be any, the main thing is to orient it to the west-east side. One side will be thoroughly insulated with foam or glass wool, and the other should be well lit by the sun.
The foundation will be poured along the edge or concrete blocks laid out, so the edge should be well aligned.
Wall construction
When the foundation is finished, you can start laying out the walls. On a concrete base there will be a metal frame on which thermal blocks will be mounted.
Next, you need to think about how it will be more convenient to put a roof:
- The best material for the roof is polycarbonate.
- Installation takes place on a metal structure with a crate.
- It is necessary to thoroughly strengthen the attachment points.
How to make thermal insulation and heating:
A special film is attached to the inside of the wall; it holds heat very well.
Tip. In regions with very cold climates, to preserve heat, you can use foil-coated film and a double layer of the base, relatively warm regions.
The main function of reflective insulation is to maintain positive temperature and, as a result, humidity and carbon dioxide level. That is, everything that is important for the normal growth of any plants.
Even inside the greenhouse, it is necessary to provide for “heat accumulators”.
Note. “Heat accumulator” - this can be any container with water, for example, bottles, they heat up well and quickly and gradually cool over time, maintaining the temperature.
The base will be heated with a warm floor. When using it, it is very important to protect the wires from damage to garden tools and moisture. To protect against both points, you can lay it in concrete, an easier way is to cover it with a net - but this is only from garden tools.
Floor heating in the greenhouse is often done under the tiles, and plants are planted in pots, tubs, lawns.
Experienced gardeners recommend making such designs combined (evenly heated both the ground and air).
Note. For plants, the main thing is compliance with the optimum temperature of 25-35 degrees heat, and the level of humidity.
How to build a roof in a greenhouse with your own hands
When the walls are completely ready, you need to prepare the roof for the greenhouse. The best option for a 12 meter design is polycarbonate.
It is necessary to provide for the construction of the roof:
- The conservation of heat inside the greenhouse is achieved through the use of a double coating of polycarbonate (cellular).
- To connect 2 sheets of polycarbonate, 4 mm thick each, a profile gasket for pipes is taken.
- The snow itself will not melt on such a double coating, so you need to use a thermal circuit, it will turn on and off using a timer.
- The use of a double coating reduces heat loss during heating, but the light permeability decreases by approximately 10%.
- We prepare rafters in advance - we impregnate with protective means.
- The connection takes place in 1/2 of the tree, and the jumper is attached so that the length at the bottom point is up to 5 cm.
- The rafters prepared in advance will be a support, the jumpers will be removed, and a ridge beam is placed under them.
- The extreme rafters are nailed to the ridge beam using the usual 20 centimeter nails.
As soon as the roof is assembled it can be painted, after the paint has completely dried, polycarbonate is attached. For fastening, you need to take wood screws. Therefore, an iron corner for the roof is fixed along the beam, and a special gasket made of heat-insulating material is also used.
The joints of polycarbonate and roof parts must be well glued with adhesive tape - tape. After all the preparatory work, you can mount the polycarbonate roof in place and fix it to the walls. Then you can proceed to the arrangement of the internal space.
Our main goal is to build a greenhouse for the winter period and make heating in it with little money and labor costs. In this article, we will consider the most economical ways to maintain heat and heating, and the choice of materials that best minimize losses.
The design should be thorough, designed for long-term use, as low as possible, economical, in terms of heating.
How to achieve savings
We divide the question into two parts. We have to:
- Build a structure that will absorb heat as much as possible on sunny days and give a minimum due to radiation and concept.
- Choose the most inexpensive way of heating in the winter (and not only) - given how this will be done and how much the operation will cost.
Do-it-yourself greenhouses - types and forms
The creation of any structure, whether it be a large house or a small greenhouse, begins with planning. The first step in this matter is to choose the design of the future building. There are many types of greenhouses that differ in their shape, complexity and cost of creation. What are they like?
Table. Types of greenhouses that you can do yourself
| Title, photo | Description |
|---|---|
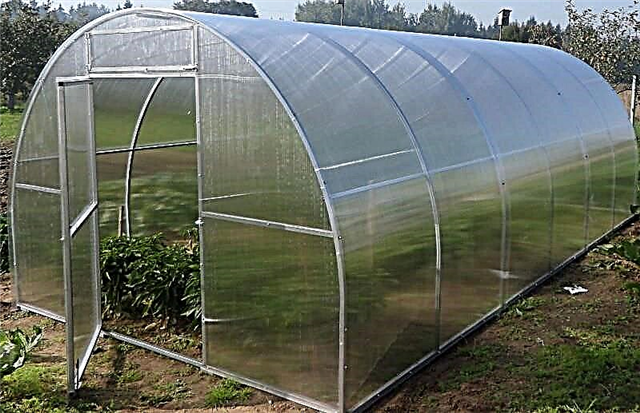
| A greenhouse whose frame in cross section has the shape of a semicircle or arch. | |
|
| The shape is similar to an arch, but more elongated and "pointed." |
|
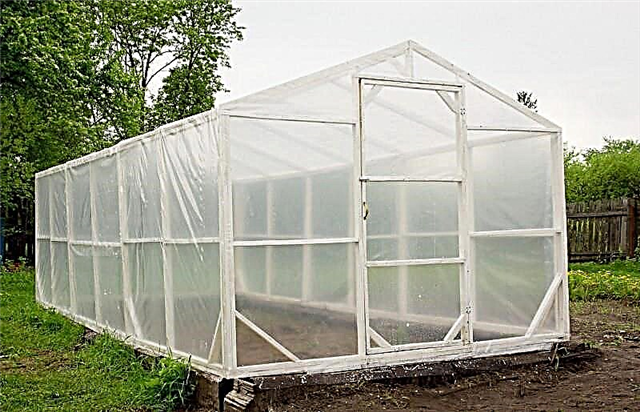
With gable roof | The classic version with a gable roof. |
|
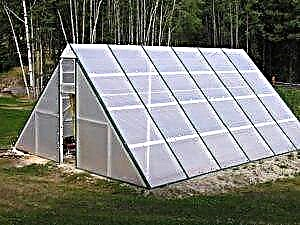
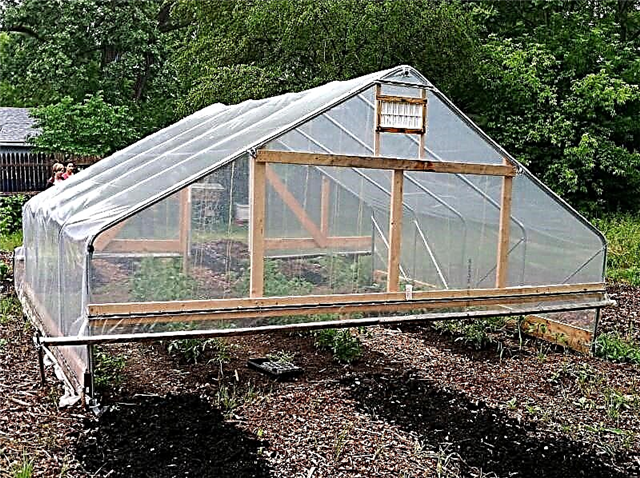
With inclined walls | It differs from the classical greenhouse in that the walls have a certain angle of inclination. |
|
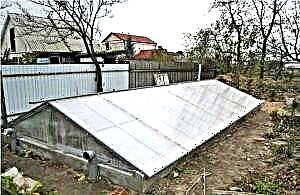
With a pitched roof | A subspecies of the classic - the walls are vertical, and the roof has only one slope. |
|
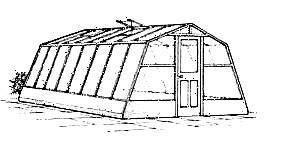
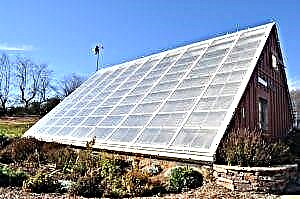
Greenhouse hut or A-shaped | It has no side walls, the roof starts almost from the ground level. |
|
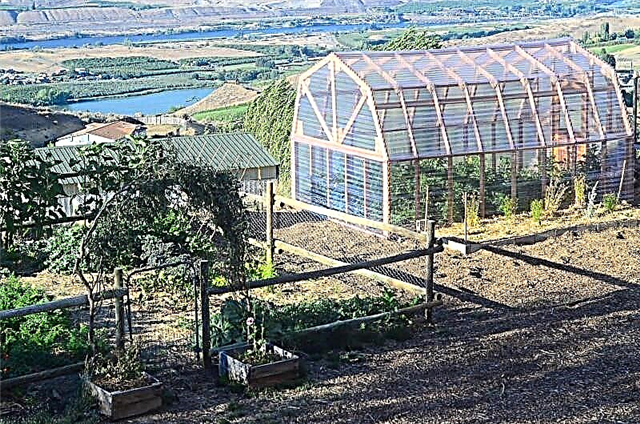
| It differs in that the roof slopes have different heights and tilts. |
|
| Most of the greenhouse is located underground - only the roof is above the ground. |
|
Capital walls greenhouse | To save heat, the northern and side walls are made capital and with insulation. |
|
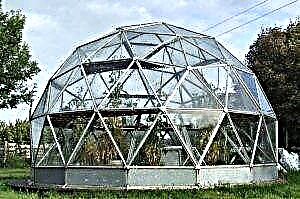
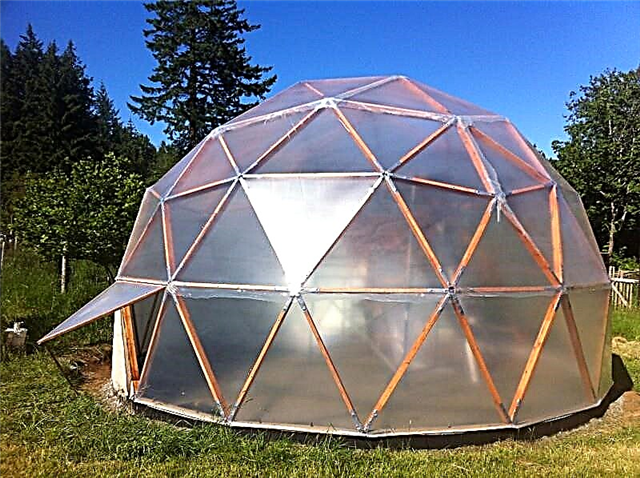
| The construction is in the form of a rounded dome, assembled from triangular cladding elements. |
|
Pyramidal greenhouse | Greenhouse in the form of a tetrahedral pyramid. |

Now move on to a more detailed description.
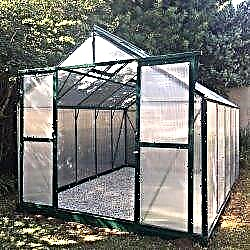
Arched greenhouse in section has a semicircular or close to shape. It is assembled from a set of arcs connected by horizontal frame elements. One of the most common forms of a greenhouse in the CIS. To produce a frame of sufficient volume, not so much material is required, which reduces the cost of the structure. Its low cost does not in any way affect its durability - a well-constructed arched greenhouse stands out for its high resistance to snow and wind loads. And thanks to the arched shape, the sun's rays, regardless of the time of day, fall perpendicular to the cladding of the structure, as a result of the loss of energy for reflection and refraction less, the plants inside receive more light. The disadvantage of this design is that it is not so easy to make bent frame elements from metal or wood at home.
Important! There is another drawback of arc-shaped greenhouses, but very subjective - not everyone likes the appearance of such buildings. Therefore, if you want to get a plant for growing plants that will also delight your eye, pay attention to other types of structures.
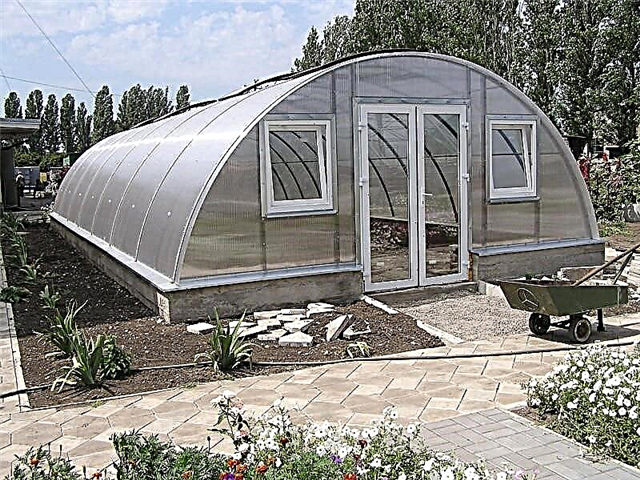
Arched greenhouse is the development of buildings of the previous type. It has a rounded, but more elongated shape, resembling the end of an arrow. Compared with arched greenhouses, such a building has even higher resistance to snow load - snow does not linger on a roof that is too steep. But to find ready-made drawings and make the frame lancet shape even more difficult than arcuate.
By the way! In English-language sources and materials devoted to gardening, such greenhouses are known as gothic arch (or in translation "Gothic arch").
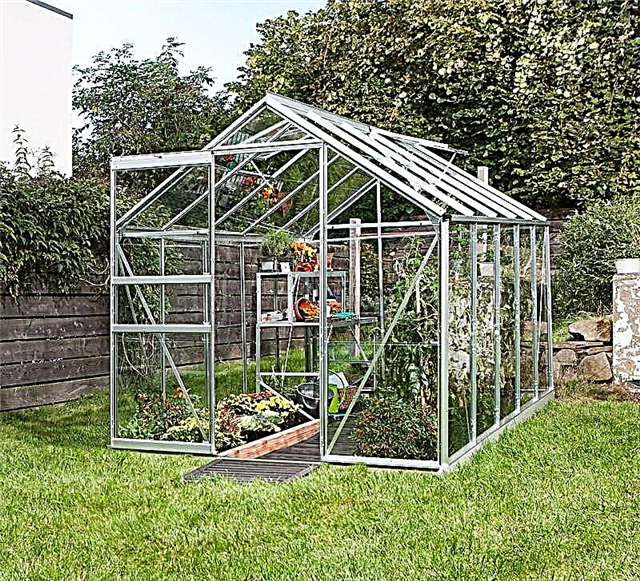
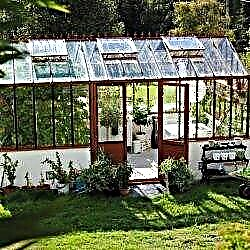
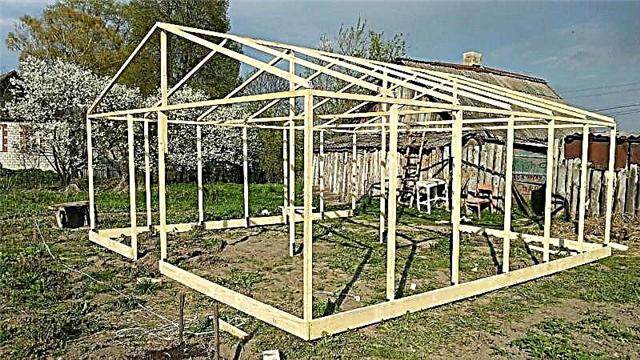
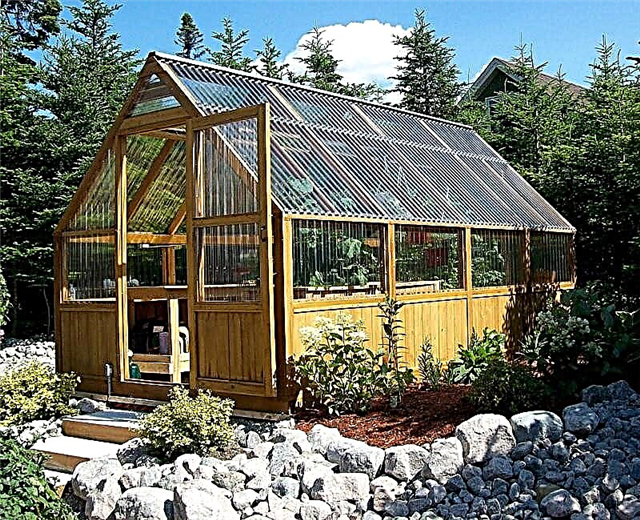
Gable greenhouse, also known as classic or "house". Previously, a couple of decades ago, it was the most common design. It differs in acceptable indicators of illumination and large volumes. In addition, it is much easier to build - the frame of a classic greenhouse consists of straight metal or wooden elements. But the flip side of this design is a large consumption of material, which affects the cost of construction. In addition, the "house" requires the presence of supports and jibs that will protect the roof from breaking through snow masses.
Greenhouse with sloping walls, also sometimes called "Dutch." It differs from the previous design in that its side walls are located not vertically, but at a certain angle.Due to this, more sunlight penetrates into plants. It requires a strong frame and a good ventilation system.
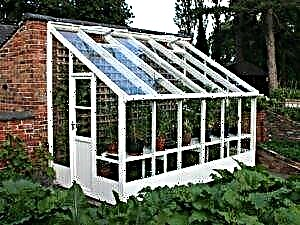
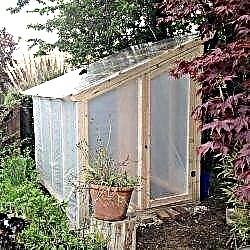
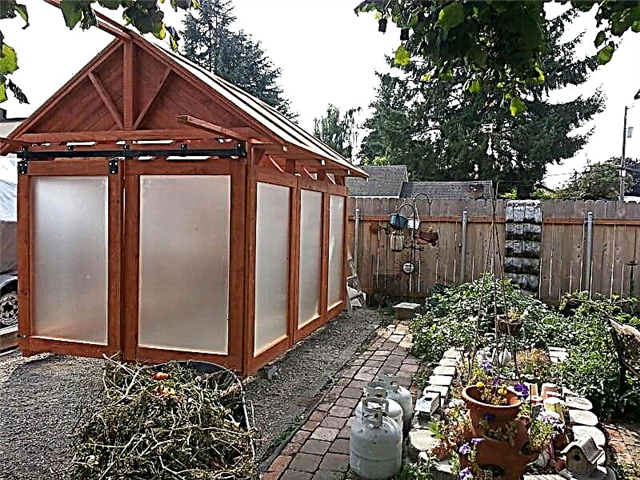
Greenhouse outwardly similar to the "half" of the house, where only one slope remained from the roof. This option is most often built as a small extension to the house, barn or fence. Used for early growing seedlings for planting on open ground.
DIY polycarbonate greenhouse
Are you planning to switch to cultivating plants indoors, but do not have enough experience in this matter? Are you going to grow seedlings? Ask yourself these questions, and if at least one of them answers “yes”, then you should think about how to build a pitched greenhouse made of polycarbonate with your own hands.
Greenhouse hut or A-shaped. Placed in the right place, it receives a maximum of solar energy, therefore the presence of window leaves is necessary, otherwise the plants will simply overheat in hot weather. The construction is relatively simple, but the useful internal volume is poor. Often, part of the building is located below ground level.
Greenhouse Mitlider created by the same expert in gardening and doctor of agricultural sciences. It differs from a classical or arched building in that the slopes or half of the roof have different heights. A vertical wall forms between them, where a number of window leaves are mounted. As a result, the greenhouse achieves the most effective ventilation and air circulation, which positively affects the yield of plants.
Greenhouse Mitlider
The Mitlider greenhouse differs from the ordinary greenhouse in that the level of slopes differs - one of them, facing the north side, is higher, and the south, on the contrary, lower. In the middle, at the junction of the slopes, there is a vertical wall with transoms along the entire length of the greenhouse.
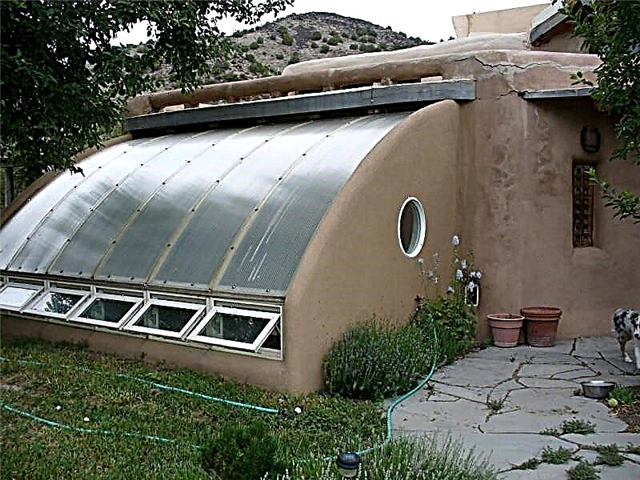
Buried greenhouse It is created with the expectation of maximum accumulation of solar energy and the preservation of the optimum temperature for the growth of crops even during the most severe winter colds. To do this, the building on the roof is submerged under the ground, which acts as a kind of heat insulator. The main problem of such a greenhouse is the huge labor costs during the construction due to the need to dig a foundation pit of impressive size. In addition, the structure needs good protection from groundwater.
Capital walls greenhouse is another example of the idea of saving heat in a building. For this, the north side of the building is made of capital from brick, timber or other material and insulated from the outside. Inside the greenhouse, in addition to plants, they place bags of gravel and other objects that accumulate heat during the day and then give it away in the evening and at night. As a result, the gardener gets a building in which you can grow vegetables even in winter and with minimal heating costs. Further, in one of the sections of the article, a greenhouse with capital walls and a solar battery will be given special attention.
Exotic and rather rare types of greenhouses, made by hand, are buildings in the form of a dome and a pyramid. The cost of their construction is several times greater than the constructions of classical forms, but at the same time they have an unusual appearance and outstanding qualities in terms of accumulating solar heat and providing a microclimate inside.
In addition to the form, the greenhouse differ in the period of operation and are divided into two types.
- Seasonal - simplest structures without any heating systems. Used during the period from spring to autumn, they allow you to "expand" the framework of the summer season.
- Year-roundor winter - built and equipped taking into account work in the cold season, they are able to provide optimal conditions for the growth and maturation of agricultural crops even in conditions of subzero temperatures outside.
Now let's move on from the structures and forms of structures to the materials from which they are created. First, consider the frame - the foundation of any greenhouse.
We recommend that you familiarize yourself with one more material for making a greenhouse with your own hands.
The appearance of the greenhouse
Usually design a greenhouse for the botanical type of plant. Factors such as the luminous flux of the coating material and maintaining the required indoor temperature are taken into account.
In the shape of the greenhouse there are:
- with one ramp. It can be a winter garden or a greenhouse. There is a passage along the entire length, usually adjacent to the south wall of the house,
- with two ramps. This is the most common form throughout Russia. It involves a variety of options for internal arrangement,
- in the form of a drop. Sufficiently stable design, but difficult to install,
- domed. It has a very spectacular appearance with a modest consumption of materials,
- polygonal shape. They look great on the garden plot of the cottage, they easily tolerate strong winds.
Greenhouse Classification
Objects that maintain the artificial climate within themselves can be classified as collapsible and stationary greenhouses. Folding greenhouses quickly enough occupied their niche in the market of gardeners.
The ultralight frame has unified parts that can be assembled and disassembled, a person can without special training. The price of such a kit will not have serious pressure on the family budget.
The coating of this design is usually a special plastic film. When handled with care, it can be used for several years.
A kind of classic for summer residents is the stationary design of the greenhouse. In this case, the steel supporting frame rests on the foundation structure. Oven windows are arranged for ventilation, at equal intervals of wall glazing sections.
This design has established itself as a long-liver in the garden. Simplicity in manufacturing and minimum operating costs are the undoubted advantage of this design.
Still greenhouses are divided by type of characteristic features depending on the author of the project. The design of the greenhouse, authored by Kurdyumov, provides for drip irrigation of plants. Greenhouses also have the ability to keep the desired temperature and humidity range.
The design of the greenhouse, authored by Mitlider, is a solid construction made of natural wood. As a rule, such greenhouses are installed in the direction of movement of the sun. This provides better illumination of plants.
Preparatory work
In order to make the simplest greenhouse manually, it is necessary to carry out the necessary preparatory measures.
When choosing a place for a greenhouse, you should be guided by the fact that there is no interference with direct sunlight. The site should be as flat as possible, it is desirable to have protection from the effects of strong winds.
It should be noted that water will be needed for irrigation and electricity for lighting. Therefore, the greenhouse should be located in the area in the permissible proximity to these sources.
Choose material for the frame of the greenhouse
Considering the choice of material of the supporting structure of the greenhouse, it should be noted that each of them is good in its own way. The following materials are considered the most popular today:
Wood. Wooden structures are simple to manufacture; no professional skills of the performer are required. Antiseptic treatment of the structure is absolutely necessary.
Aluminum. Low specific gravity of metal and sufficient strength give the frame an aesthetic appearance, stability and durability. The high price of the profile is the main obstacle to widespread use.
Plastic. Thanks to its low specific gravity and sufficient strength, the metal-plastic profile has gained popularity among summer residents.The relatively low price and high performance characteristics have become the hallmark of this material.

Steel. Steel galvanized profiles are quite popular in the construction of greenhouses. Installation of the frame from a profile galvanized pipe does not require special training and equipment. Under such a framework, it is necessary to arrange a strip foundation.
Installation of the supporting frame of the greenhouse and coating
A reliable frame design will guarantee the protection of plants from the hot rays of the sun and heavy rain.
After the concrete in the foundation has gained the necessary strength, it is possible to prepare the frame elements for assembly. Elements of the lower belt and struts are interconnected by bolts.
The elements of the upper girdle and roof slopes are connected in series to a spatial structure having rigid connections. The front door is located on the leeward south side.
Effective whirlpool ventilation should be ensured by placing opening vents in the roof structure.
When making polycarbonate do-it-yourself greenhouses, the sheets are attached to the frame with steel anodized screws. A rubber seal is laid between the polycarbonate sheet and the carcass element.
Glass coating is the most traditional material. However, high operating costs forced him to the greenhouse materials market.
Film coating is characterized by low price and ease of operation. It should be noted the low durability of this material.
Varieties of types and forms of greenhouses
Today you can find different forms of greenhouses. Most Popular:
Between themselves, they differ in the shape of the roof. There are also other differences, they are indicated in the table:
| Greenhouse comparison | |
| The name of this greenhouse speaks for itself. The shape of the roof is semicircular. This is a kind of tunnel with walls. For this form, polycarbonate is an ideal shelter. It easily bends, forming a smooth arc. | Its manufacture is carried out from separate blocks. On average, the height of the building reaches 2500 mm, sometimes higher. Length and width are determined individually. The shape of the roof is predominantly gable. |
Some greenhouses are not built to grow certain crops directly in the ground. In this case, the construction of special racks and shelves will be required.
There are options for greenhouses with removable insulation boards. For example, they can be removed during the warm season. When it is cooling, removable shields are installed in their place, and they protect the plants from cold and rain.
In any case, regardless of the chosen form of construction, the following must be considered:
- The greenhouse must be durable and functional.
- All plants must be freely accessible.
Polygonal dome-shaped greenhouses attract with their originality and shape. The manufacturing process is laborious. Moreover, it is extremely difficult to sheathe them with polycarbonate.
Important nuances of choosing an installation location
There are several important nuances that should be considered when choosing a place for installation:
- soil composition
- landscape drawing
- side of the world.
As for the landscape drawing, it is important to consider the nature of the terrain or the dynamics of the state of the soil. For example, if a greenhouse is installed on a slope, will it not flood if the snow or snow melts. Also pay attention to the level of freezing of the soil and the level of groundwater. The values should not be higher than 1.2 m, otherwise rising water will soak the roots, which eventually rot.
Note! If the groundwater in your area is higher than 1.2 meters, then you need to make a drainage system to remove moisture.
As for the choice of cardinal points and suitable soil, it is worth talking about this in more detail. With insufficient attention to this issue, the yield in the greenhouse can be poor. This will be discussed further.
Determination of soil for growing greenhouse plants
The soil should be relatively dry and even. If you dig a shallow hole where you plan to put a greenhouse, and find clay in it, then this place is not suitable for a greenhouse. Clay retains moisture, so after each watering, water will stand on the surface for a long time.
The ideal soil is sandy soil. If there is no sand on your site, it is important to perform a number of additional work: dig a pit, pour sand gravel and fill up a sand cushion. A layer of fertile soil should be poured on top.
The choice of cardinal points
To begin with, it is worth noting that the correct location of the greenhouse relative to the cardinal points contributes to serious savings of your money. If the greenhouse receives enough sunlight, there will be no need for lighting. In addition, sunlight will provide plants with the necessary heat. Agree that the organization of heating and lighting of the greenhouse will require a lot of money, but finances are still needed to maintain the systems and maintain them in working condition.
So, there are 2 good ways to install a greenhouse relative to the cardinal points:
- from east to west
- from North to South.
The first option is the most effective. Due to this arrangement, plants will receive sunlight throughout the day.
Note! If your greenhouse is square, then these requirements do not apply to it. The determination of the cardinal points is necessary for greenhouses with dimensions of 3 × 6, 3 × 8 m or more. You can set the square greenhouse as it will be more convenient for you.
Determining the location relative to buildings and trees
An important role is played by the location of the greenhouse in relation to existing outbuildings and trees. So, the shadow from the house or trees should not fall on the greenhouse. If you place a greenhouse near a tree, then foliage will accumulate on the roof of the greenhouse, which prevents the penetration of sunlight into the greenhouse. You will have to constantly ensure that the roof is clean.
Having considered the main nuances of the location of the greenhouse, we suggest returning to our main topic. Let's talk about the advantages of using polycarbonate, as well as about the features of its choice.
Which polycarbonate to choose for a greenhouse
The market offers polycarbonate in various designs. Our goal is to choose the most suitable material for the greenhouse. This is an important stage, because polycarbonate plays an important role in obtaining a good harvest. So, proceeding to the selection, it is worth remembering the following:
- Often you can find low-quality polycarbonate. The worst part is that it is sold under the guise of branded materials.
- There is lightweight polycarbonate on sale - it has thin walls. Its use is cost-effective in warm climates. With sudden changes in temperature, such a polycarbonate will become brittle. Moreover, it will not provide sufficient greenhouse strength.
- Often, the indicated parameters on the packaging do not correspond to reality. For example, if a sheet thickness of 4 mm is declared, then it may turn out that it is only 3.5 mm. And it is not recommended to buy such polycarbonate.
- If you want to purchase wear-resistant polycarbonate, then weight plays an important role in its selection. A normal and high-quality sheet of standard sizes will have a weight of about 10 kg. The lightweight version is 8.5 kg, or even less. The latter do not differ in high strength - they are fragile.
- On high-quality polycarbonate there is always a mark on the method and method of its installation. The presence of a special protective film from ultraviolet rays also indicates quality.
- High-quality polycarbonate is flexible and easy to use. It should not be too fragile.
If you are planning a large purchase of material, you can ask for documentation and a quality certificate.Usually it indicates the weight, size, manufacturer and other necessary data.
New polycarbonate must be packed in polyethylene. On the side that is protected from ultraviolet rays, and on the edge of the elements must be appropriately marked. In its absence, it is better not to buy plastic.
For the greenhouse, cellular polycarbonate is most often used. And this is logical, because it is relatively transparent, transmits up to 88% of the light, and during operation these indicators do not decrease. If we talk about impact strength, then it is 100 or more times greater than that of glass. We also highlight other features of this type of polycarbonate:
- The thermal conductivity of a material 4 mm thick is 2 times greater than that of glass. Which saves energy up to 30%. High thermal insulation is achieved due to the presence of an air gap.
- The material is self-extinguishing, so it is considered fireproof.
- Easy to install. The greenhouse can be given any shape.
- The material is resistant to various atmospheric phenomena. It is recommended to be used at temperatures ranging from –40 ° С to + 120 ° С. During operation, he does not lose his qualities.
Now let's pay attention to the appropriate thickness of the material for the greenhouse. The optimum thickness is 8 mm. The thicker the polycarbonate, the larger the step is permissible in the crate. Thin material has a lower price, but the crate must be done in small steps, plus its impact resistance is lower.
So, choosing polycarbonate, start from the following recommendations:
- for greenhouses - up to 4 mm,
- for a small greenhouse - 6 mm,
- for the average area of the greenhouse - 8 mm,
- if the greenhouse has a large vertical part, then the recommended thickness is 10 mm,
- in case of large spans, 16 mm thick material is recommended.
An important factor is the choice of material density. For a greenhouse, it should be 800 g / m 2. You can even determine the density visually. If in a lying position the sheets do not look skewed, do not have bends or other deformations, then polycarbonate is of sufficient density. But it’s best to ask for documentation with technical specifications.
Which is better - finished or homemade
If you don’t like to do something yourself or don’t have any time for it, then the ideal option would be to buy a ready-made greenhouse. You will get a complete set, which includes the frame, fasteners, cover and the like. However, such greenhouses have a number of drawbacks that cannot be ignored. Factory-made greenhouses often do not meet the stated GOSTs. As a rule, such frames are less stable. Therefore, before installing them, you should make a good foundation and further strengthen the design.
The metal frame is often subjected to corrosion, and very quickly there is a need for repair. It is quite another thing when everything is made independently. Doing everything from scratch, you will never save on consumables.
Below we propose to watch the video material, which provides an option for the finished greenhouse.
Polycarbonate Greenhouse Frame Options
The frame can be made of various building materials. Each of them is of high quality, which affects the duration of operation. For example, a greenhouse can be made based on:
- profile pipe
- tree
- galvanized profile,
- polypropylene pipe, etc.
It is impossible to say unequivocally which of them is the best, because everyone has undeniable advantages:
| Polycarbonate Greenhouse Frame Options | |
| The material is durable. It does not corrode when exposed to moisture. The advantages include ease of installation. The structures are lightweight, so there is no need to make a heavy foundation. However, there are also disadvantages. If there is a lot of snow in your area, then the galvanized profile can bend, unable to withstand the load. | |
| This material is budget, unlike analogues. This frame will last more than one year. Polypropylene is not subject to corrosion. However, due to the light weight of the structure, the frame must be attached to the ground. And very reliable. Otherwise, under the influence of wind, the greenhouse may roll over. | |
| Also quite accessible material. Using this material, you can completely independently make the frame for the greenhouse out of polycarbonate. But there are some disadvantages. Wood itself absorbs moisture. For this reason, it is susceptible to corrosion and rots. Accordingly, a reliable foundation is needed, high-quality processing of the frame with an antiseptic and high-quality wood. | |
| This material is light in weight. However, for the price it is the most expensive. Given that a thick aluminum profile is needed for the greenhouse frame, everything will cost a lot in the end. Although the quality of such a frame will fully justify itself. | |
| This material is undeniably the best in strength. However, to assemble such a greenhouse, a welding machine is required. A bolted connection is not the best option, although possible. To prevent the formation of corrosion, it is necessary to treat the profile pipe with a special composition. The installation process is quite laborious and requires a lot of labor. |
What you should pay attention to when determining the design of the frame:
- Plan a competent arrangement of window leaves. For normal ventilation, 2 small windows are enough.
- If the greenhouse is large, then ventilation windows should be located every 2 meters.
- Often you need to think about organizing lighting, especially if you will grow vegetables for seedlings.
- Correctly calculate the number of sections and arcs in the future frame. Remember, the strength of the frame depends on the cross-section of the profile. The pitch between each section should not exceed 700 mm. Although today you can find ready-made greenhouses with a pitch between arches up to 2000 mm. This is not the most durable option.
- Correctly choose the thickness of polycarbonate. The subtleties of this process we discussed above.
So, these are the main nuances that should be taken into account when forming the frame structure.
Foundation manufacturing options
Like any other building, the greenhouse should also be located on the foundation. It just may differ in the material used. It is worth noting that the base under the greenhouse should perform several important functions, among which:
- providing a reliable framework for the frame,
- preventing direct contact of the frame wall with the soil, which provokes heat loss of up to 10%,
- the exclusion of moisture inside the greenhouse,
- prevention of penetration into the greenhouse of moles, shrews and other “uninvited guests”.
We offer you to familiarize yourself with several types of foundations that are successfully used in the construction of a polycarbonate greenhouse:
We offer step-by-step construction instructions for each type of foundation. Of course, you may know other methods, but we will describe the most accessible and common.
Tape
This type of base has a high degree of strength. On it you can mount the frame for the greenhouse from any building material. In addition, it provides excellent protection against the penetration of cold and excessive moisture. The manufacture of such a foundation is carried out in several successive stages, which are reflected in the table:
| Work stages | Instruction manual |
| Stage number 1 | To begin with, the strip foundation is marked. To do this, pegs are installed around the perimeter. To get the right size, measure the diagonals and the angles themselves. The diagram shows how to perform these processes: For a polycarbonate greenhouse, a foundation with a width of 250 mm to 400 mm will be sufficient. |
| Stage number 2 | Now, after marking, it is necessary to carry out earthwork. A trench along the entire perimeter of the foundation is dug to a depth of 600 mm. |
| Stage number 3 | The bottom of the trench is leveled, and a sand cushion with a thickness of about 100-150 mm is filled up. A layer of sand and gravel is necessarily rammed. This layer is necessary in order to create a good foundation for concrete and prevent it from mixing with the ground. |
| Stage number 4 | Now you need to set the formwork. In the photo you can see a small area of the formwork, namely, the way to mount it: The formwork must be firmly fixed. Outside, supports in the form of stakes or struts must be installed. It is necessary to pull together the formwork with a screed from a wooden beam. Above ground level, the strip foundation should rise 300 mm. |
| Stage number 5 | At the bottom of the trench, reinforcement is necessarily laid in the form of a wire-bound frame. This will give strength to the base. |
| Stage number 6 | Now the concrete solution is kneaded. It is best to fill the foundation in one go. Having laid a layer of liquid concrete, be sure to compact it and vibrate. This will eliminate the formation of voids in the concrete body. |
That's it, the strip foundation is ready. Depending on the type of frame, you can immediately insert metal embedded rods into concrete that will stick up. But it depends on the type of frame chosen. After pouring concrete, it is recommended to cover it with polyethylene. This is especially necessary if the weather is sunny and hot. Concrete will gradually dry out.
Wooden
If we talk about the simplest and most inexpensive foundation, then this is a tree. Such a foundation will allow you to move the greenhouse to another place if necessary. However, remember the important disadvantage of such a base - the tree is corroded. At the heart of the wooden foundation is a bar. Manufacturing work is as follows:
| The technology of manufacturing a wooden foundation under the greenhouse | |
| First of all, it is necessary to make markup. This stage of work is performed regardless of the type of foundation. In this case, wooden bars of 100 × 100 mm are used. Depending on the weight of the frame, the thickness of the timber may be greater or less. | |
| Bars are measured strictly according to a given size. Using a marker, they are marked and prepared for cutting. | |
| It is convenient to use a chainsaw for cutting a beam. It is important to observe an angle of 90 °. | |
| When you will be laying the bars, use the level. Thanks to this, the frame for the greenhouse will be smooth. | |
| There is a method of joining groove bars to groove. In this case, a metal corner will be used. The edges of the timber are mounted on supports. Previously, the foundation is laid in the ground of bricks, blocks or made of concrete. | |
| Again, pre-measure everything by level. At this stage, the supports under the beam are already laid and clearly installed. | |
| The next step is to measure the diagonals. | |
| Their sizes must match. If this condition is not met, then problems may occur. | |
| If the dimensions are all the same, then soil is sprinkled under the beam. It is also worth making control measurements using the level. | |
| At the last stage, the metal corner is fixed using self-tapping screws and a screwdriver. | |
| At the same time, control the diagonals so that your previous measurements are not violated. | |
| The end result is such a foundation for the future greenhouse. |
It is important to highlight some of the nuances. In the method of laying the wooden foundation described above, the beam has direct contact with the ground. For this reason, the beam must be treated with special anti-corrosion mastic. But this is short-lived, therefore, after some time, it will be necessary to repair the base. To eliminate this problem, some erect a wooden base on a metal column foundation. How to do this, see the prepared videos.
Columnar
This type of base for a greenhouse is combined with a tape. We will give instructions for manufacturing a columnar foundation on metal pipes. Wooden bars will be laid on top. All instructions are presented in the table:
| Work sequence | Tape Base Manufacturing Process |
| After the markup is completed, we determine the places for laying the pillars. The support posts must be located at the corners of the greenhouse. On the long side, the pitch between the posts can be up to 3 m. Everything will depend on the weight of the future design of the greenhouse. Wells Ø300 mm are made. | |
| Ruberoid is placed in the finished well, which will protect the concrete from direct contact with the soil. Ruberoid just should form the desired diameter of the hole in 300 mm. A pipe is inserted in the middle of the well, the walls of which must be at least 3 mm thick. As for the diameter of the pipe, it can be different and 50, and 75, and 100 mm, etc. The pipe is installed strictly vertically. | |
| Concrete work is now in progress. The inside of the roofing material is completely poured with concrete. So that the concrete mixture does not push through the roofing material, it is simultaneously necessary to pour and tamp the ground. The level of the poured concrete should be on par with the soil or protrude slightly. | |
| According to this scheme, each support is installed under the foundation of the greenhouse. | |
| When the concrete has completely hardened, it is necessary to make preparations so that the column supports are cut to the same level. For this, such a device in the form of a clamp is useful. When you mark the cut level, you can use the template to make an even cut. | |
| The next step will need a laser level. At one point it is necessary to install it and “shoot” it with a laser beam at all installed pipes. On pipes marks of a cut are put. | |
| After that, using a special clamp, a cut is made according to the marks with a grinder and a circle for metal. Thanks to this technology, you can ensure a flat surface on the top of the pillar support. | |
| At the next stage, the concrete mixture is prepared. A kind of watering can is made, which will direct the entire concrete mixture into the middle of the pipe. Concrete must fill the entire inside of the pipe. As you know, in contact with concrete, the metal does not rust. As the pipe fills, take metal reinforcement or another pin and pierce the concrete to completely eliminate the presence of air in its inside. | |
| When the concrete has gained strength by 50-60%, you can proceed to the next stage. A metal sheet with a thickness of 8 mm is taken. For corner pillars, these corner plates are cut off. Holes are made in them, through which wooden beams will be attached. | |
| The intermediate beams will have these metal plates, which will either connect the two beams to each other or fix the beam along the entire length. | |
| As a waterproofing for each columnar support, such "bedding" from roofing material is cut out. Already on top you can stack the bars and fasten them for the subsequent formation of the frame of the greenhouse. |
Today, there are other technologies for making the foundation for a polycarbonate greenhouse. You should choose the most suitable option. In this case, always take into account the fact that polycarbonate itself does not have a lot of weight. Therefore, the strength of the foundation is determined based on the weight of the frame. It is clear that if it is a metal frame, then a stronger foundation is needed. Next, we offer to see several options for manufacturing a frame for a greenhouse.
Greenhouse frame
As for the frame of the greenhouse, it can be made of several materials. For example, the simplest is a wooden beam. More expensive technologies are also used, including an aluminum profile, metal pipes and a metal profile. We offer you to familiarize yourself with the technology of manufacturing a frame using various building materials.
Robust profile tube frame
First of all, it is worth considering the features of this material. Is it so good for making a greenhouse.A metal profile pipe is a pipe with a rectangular section. This material has found wide application due to such technical characteristics:
- the edges of the load are distributed evenly, this ensures greater strength of the frame,
- running meter has an affordable price,
- the presence of flat sides simplifies the fastening of polycarbonate,
- the greenhouse from the profile as a result is quite strong and durable.
Most often, a profile pipe with a section of 40 × 20 or 20 × 20 mm is used.
Drawing of a greenhouse from a profile pipe. What is important to consider
When making a frame drawing from a profile pipe, it is important to take into account that the length of the rolled profile pipe has a limit of 3, 6, 4, 12 m, etc. Knowing the parameters of the future greenhouse, as well as the length of the profile, you can save a lot of money. How? For example, you can design a drawing so as to minimize waste. Moreover, the dimensions of the greenhouse can be adjusted to the existing dimensions of the profile pipe.
Note! If a profile for racks is bought, then it is better to give preference to pipes with a cross section of 20 × 40 mm, if we are talking about cross sections, then pipes 20 × 20 mm will be a suitable option.
When making a drawing, be sure to prepare the following elements:
- roof,
- upper / lower harness,
- vertical racks
- openings for windows and doors,
- additional items.
The installation step of each rack can reach 1 m.
As for the manufacture of the roof, it is necessary to prepare a kind of farm. They can have two slopes or be in the form of an arch. It all depends on your preference. But not only that. To create an arch-shaped roof, it is necessary to bend the profile pipe on a special pipe bender. As for the gable roof, only welding is necessary.
Note! Among other things, be sure to consider the dimensions of the polycarbonate. For example, find out the width of the sheet and determine where exactly the joint will be.
If you have an arched roof, then take into account the fact that for the construction of a greenhouse about 2 m high, you will need a profile of 12 m. You can use this option: buy two profiles of 6 m and connect each other.
To form the roof of the greenhouse, they use a simple option. At the same time, minimal welding work will also be necessary. So, it is necessary to make incisions with a grinder in suitable places of the pipe and just bend it. Here is the form:
It is imperative to perform accurate measurements and cuts to prevent errors. Each segment must be welded together:
A calculation is also performed regarding the location of the ventilation window and the door in the end of the frame. Look at the diagram:
There is also a scheme for assembling a greenhouse from a profile pipe, on which all connections are indicated:
Assembly instructions for the frame of the greenhouse with a gable roof
Now we offer a small instruction for the manufacture of a frame for a greenhouse from a metal profile in the table:
| Work sequence | The processes |
| Foundation preparation | For the construction of the frame from a metal profile, a strong foundation is needed, it is advisable to fill in the tape. It is also possible to lay embedded elements in the form of anchors in the form of anchors, by means of which the future frame will be fixed by welding or by the bolt method. |
| Profile Preparation | Now you need to cut the purchased profile into the appropriate sizes. First of all, the frame racks are formed. |
| Installation of support posts | After that, pillars of support around the perimeter are welded to the mortgages in the foundation. Mandatory in the corners, as well as in increments of about 1 meter. It is important to use the level to install the racks strictly vertically. |
| Installation of the upper harness | At this stage, the piping must be welded around the perimeter of the upper part of the pipe. Thus, all installed racks will be connected in one design. |
| Struts between racks | To make the design of the greenhouse stable, crossbars and struts are welded. They can go perpendicularly or obliquely. Their main task is to give the greatest rigidity. |
| Roof manufacturing | For the manufacture of a gable roof, two segments of a profile pipe are measured. After the ridge is formed, and the pipes are welded at the top point. You can use the method described above by performing slices with a grinder. By bending the pipe, you immediately get 2 slopes that remain to be welded to the frame structure. |
| Door installation | On one end side, you must install the door. To do this, use a loop. The door frame is also made of pipe, after which it is sheathed with polycarbonate. |
There is a technology by which all the basic elements are assembled on a flat horizontal surface. Then the assembled farms are interconnected and attached to the foundation.
If you want to give the roof a shape of an arc, then cut off part of the pipe and, using a pipe bender, bend it to the desired radius. Of course, here you need to work hard. If there is no pipe bender, some home craftsmen make cuts on the pipe and bend it. But this method is ineffective, it is better to use a device for bending pipes.
We offer several videos on the manufacture of a greenhouse from a metal profile. At the same time, consider options with a gable roof and in the form of an arch.
Greenhouse wood frame: gable and arched
The frame for a greenhouse made of wood has its own characteristics and advantages. Among the positive aspects are the following:
| The benefits of a greenhouse made of wood | |
| Low cost | Unlike metal, the raw material for a wooden greenhouse is much cheaper. |
| Simplicity in work | During construction, there is no need to use welding units. For work you need a screwdriver / screwdriver, a hacksaw and a hammer. These are the main carpentry tools. |
| Maintainability | If one of the structural elements breaks down, it is very easy to replace. |
| Easy polycarbonate mounting | It is easiest to fix polycarbonate on wooden blocks. No need to drill holes. |
| Environmental friendliness | The material is absolutely environmentally friendly and does not pose any threat to the environment. |
| Light weight | The general design of the frame of the greenhouse made of wooden timber will have much less weight, in contrast to the metal profile pipe. |
| Easy care | There is no need for special care during operation. |
Indeed, wooden greenhouses are a great solution. They fit perfectly into the landscape of your suburban area. Now we propose to consider 2 instructions for the manufacture of an arched greenhouse and a gable.
Arched greenhouse made of wooden blocks
The main problem of the arched greenhouse is the manufacture of a wooden arch. Made arcs must have high strength. But everyone can make such a greenhouse. You will see this yourself now.
To get started, prepare the following building material:
- 50 mm thick boards
- timber 50 × 50 mm,
- self-tapping screws
- metal furniture corners.
As for the tool, this is a standard carpentry set, including a hacksaw for wood, a hammer, a screwdriver, drill, level, tape measure, etc.
We suggest step by step to follow how to make just such a greenhouse. It is immediately worth noting that this type of greenhouse is ideally combined with a wooden foundation:
Some sizes will be given below. Based on your circumstances, you can replace them with your own, increasing or decreasing the design of the greenhouse. So, first of all, the most key element is made - an arch or arc. It will consist of many similar elements:
For the convenience of work, it is first recommended to make a pattern, for this a dense cardboard is suitable. After that, take a board 50 mm thick and put your piece on top of it. Using a marker, transfer its outlines to the board.For less waste, place the pattern on the board most rationally.
Next, an electric jigsaw is taken, and the desired shape is cut out. In the end, you should get this element:
Having cut the required number of such elements, you can begin to assemble the first layer of the arc. In the provided scheme, 17 such elements were used. In your case, there may be more / less.
Elements for forming an arc are laid out on a flat surface, as shown in the diagram:
Each element must be stacked to each other as tightly as possible and without gaps. The result is such an arc:
The second layer of the arc should act as a mount. Mounting is carried out according to this principle:
Both ends of the board should be in the center of the already fixed element, that is, with a slight offset. Between themselves, all elements are connected by self-tapping screws. To prevent the elements from breaking, it is recommended to drill holes for self-tapping screws. But the diameter of the hole should be less than the diameter of the mounting screw. This way you will collect the whole arc. The number of such farms will depend on the footage of the entire greenhouse. The step between them should be no more than one meter.
Note! Once you have made all the finished elements of the greenhouse, you need to treat them with a special antiseptic against decay. This eliminates their destruction under the influence of moisture.
At the next stage, it is necessary to mount the arcs to the foundation. This is done according to this scheme:
Fastening can be done using furniture metal corners. Step by step, you get this frame:
After stiffening ribs are surely fixed. For this, a beam with a section of 50 × 50 mm is used. The length of the beam depends on the length of the greenhouse. As a result, you should get this:
A similar frame for a polycarbonate greenhouse can be made by each summer resident independently. You will get a similar design:
The technology of manufacturing a gable wooden greenhouse
To make a greenhouse with a gable roof is much easier. Detailed drawings and diagrams will help here. Thanks to them, it will be easier to collect the necessary building material. The basis of the frame structure can be used bars 50 × 50 mm as supports and for the frame 100 × 100 mm.
It is worth noting that the principle of manufacturing such a greenhouse is similar to the sequence of manufacturing a greenhouse from a profile pipe. Only in this case is everything much simpler. Support poles are installed around the perimeter: at the corners of the greenhouse and in increments of up to 1000 mm. For greater strength, the lower strapping and the upper are performed, for this purpose a beam is used. For the rigidity of the walls of the structure, the cross members are necessarily fixed.
The formation of two roof slopes is performed on a flat horizontal surface. Using the prepared drawings and diagrams, you can cope with this work quite easily and quickly.
Self-tapping screws, metal corners, and in some cases nails, are used to connect the bars. Below we offer to see the principle of manufacturing such a greenhouse.
Greenhouse made of galvanized profile
This material is also used to make the greenhouse. He has many positive aspects, among which stand out clearly:
- easy installation
- a small set of tools for installation,
- galvanization is not subject to corrosion,
- the frame does not need to be painted and coated with protective compounds,
- the total weight of the greenhouse will be small, which saves and builds a small foundation,
- unlike a profile pipe, a galvanized profile is cheaper,
- speed of assembly.
The manufacturing process is relatively simple, the description is presented in the table:
| Work stages | Process description |
| Stage 1 | For the manufacture of the frame requires a flat horizontal surface. Otherwise, there is a risk that the frame will have bumps that will adversely affect the fastening of polycarbonate. So, first of all, the frame of the rear and front wall is made.Spread a rectangular shape or square on the ground (depending on the selected shape of your greenhouse). Its upper and lower parts are the width of the greenhouse, and the two side (left and right) - support posts. |
| 2 stage | Measure the diagonals of the structure. They must match. Difference is allowed up to 5 mm. That is, you should get an even figure, but in no case a rhombus. |
| 3 stage | After inserting the profile into each other, fasten it with metal screws. The galvanized profile is relatively soft, so there is no need to drill holes. For each mounting unit, 2 self-tapping screws are necessarily twisted. This will give the frame structure greater rigidity. |
| 4th stage | After the assembled square / rectangle, find the middle of the upper part and draw a perpendicular line from it to form the roof ridge. |
| 5 stage | From the marked point, measure the distance to the edge of the upper corner of the greenhouse with a tape measure. As a result, you should get 2 skates of the same size. Then a profile of the appropriate size is taken and cut in half. At the cut, the profile bends, and so the gable roof is formed. |
| 6 stage | The roof element is attached to the frame. The finished structure is also additionally fastened with stiffeners. Crossbars can be located diagonally or crosswise. There is no strict rule. The main goal is to create the necessary rigidity. According to this scheme, the second part of the end side of the greenhouse is assembled. |
| 7 stage | Necessarily in the end part an opening for the door is formed. |
| 8 stage | Given the size of the polycarbonate sheets, it is calculated how many and in what places additional trusses need to be installed. Standard polycarbonate has a width of 210 cm, so the normal span will reach 105 cm. |
| 9 stage | When all the frame elements are prepared, it remains to complete the installation of the greenhouse. Be sure to fasten spacers, screeds and cross members for greater stability of the greenhouse. |
To eliminate an unpleasant phenomenon in the form of a broken greenhouse, between each rack, additionally set the profile diagonally. Even a strong wind load in this case will not violate the integrity of the greenhouse frame made of galvanized profile.
Note! For the manufacture of such a frame, a plasterboard profile is often used. Therefore, you can calculate what is cheaper.
Building
First, we sweep greenhouses using film or made of wooden frames, with glass, in one or two layers. Why so?
In the first version, heat conservation can be forgotten in principle. Losses due to convection are very large, and even this material is too easy to accidentally damage. In winter, all these facts will definitely lead to the death of the crop. Such a greenhouse is inexpensive, in terms of financial costs. But the heat-insulating properties of it are practically equal to zero.
In the second option, also a practically insoluble question will be - heat leakage through the holes between the glass and the frame. Wood can dry out or change shape when humidity changes. Also, due to the effects of snow and rain, it is necessary to cover the frames every year with protective compounds, for example, paint.
Greenhouses
Greenhouse Usually adjoins one wall to any solid summer house. And some summer residents attach it to the southern part of a country house.
Shed greenhouse. Photo from parnikiteplicy.ru
Such an extension is very budgetary and allows you to save space on a summer cottage. And if the room adjacent to the one-slope greenhouse is heated, then in general it’s wonderful! You will spend less effort on heating it. But, unfortunately, the snow from the roof of a single-slope greenhouse does not roll itself, so you have to clean it after every snowfall.
Gable Greenhouses
The most common type of greenhouses is gable, where the roof is framed in the form of a triangle.
Gable Greenhouse
The main advantage of such a structure is the scope for you and your plants. Some summer residents even build in a gable greenhouse a kind of recreation area, combining business with pleasure.
In addition, all types of greenhouses can be divided into winter and summer.
Winter greenhouse
The winter greenhouse must necessarily be heated, so think for it a place closer to the communication system of the house, because you will connect the heating pipes to the central heating system.
Although there is another option: equip the greenhouse with a stove. But this is unnecessary trouble: you need to regularly heat the stove and constantly monitor the temperature regime. When constructing a winter greenhouse with your own hands, you must definitely put it on a solid foundation and strengthen the base and the roof well. Indeed, under the weight of snow, a structure can easily deform, or even completely collapse, alas ... it happens.
Thermos greenhouse buried in the ground. Photo from the site city-met.ru
You can build a so-called greenhouse-thermos, which is deepened into the ground by 2 m. Accordingly, you need:
Summer greenhouse
Summer is usually called greenhouses, the frame of which is covered with a dense plastic film. This is the simplest and cheapest option for cladding, and with careful use, a plastic film is quite capable of lasting a couple of seasons.
Summer greenhouse
As a rule, a wooden frame is built under the film greenhouses, on which, in the spring, with light movements of our caring handles, a thick plastic film is put on and fastened to the wooden base with ordinary nails with a wide hat (you can also fix it with special construction buttons). And you can use plastic polyvinyl chloride pipes (PVC) for the frame. It’s not very difficult to build a film greenhouse with your own hands even for summer residents who do not have good building skills. Therefore, I will tell you about the construction of a film greenhouse with a PVC frame. So, let's get started.
Stage 1
At the first stage of work you need prepare a flat area under the greenhouse, ram it well and knock down the boards treated with an antiseptic around the perimeter.
The foundation for the greenhouse. Photo from oteplicah.com
At the corners of the box from the boards, it is necessary to strengthen the reinforcement, as shown in the photo.
Stage 2
Fix along the perimeter of the foundation several rods of reinforcement at an equal distance from each other. For a 3x6 m greenhouse, you will need 30-35 rods. Dig the rods into the ground to a depth of 40-50 cm and strengthen them well, because they are designed to hold quite a lot of weight.
We drive in the reinforcement. Photo from oteplicah.com
The height of the rods above the ground should be at least 60 cm.
Plumbing, electricity, greenhouse heating
After the frame of the greenhouse, coating, ventilation, is completed, you can proceed with the installation of the electrical network, heating and water supply.
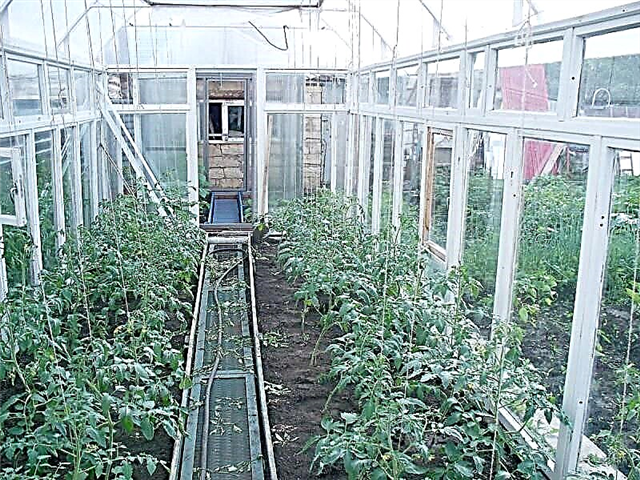
Given that the humidity in the room will be high, all electrical work must be carried out taking into account the requirements of the relevant standards and rules for the performance of special works.
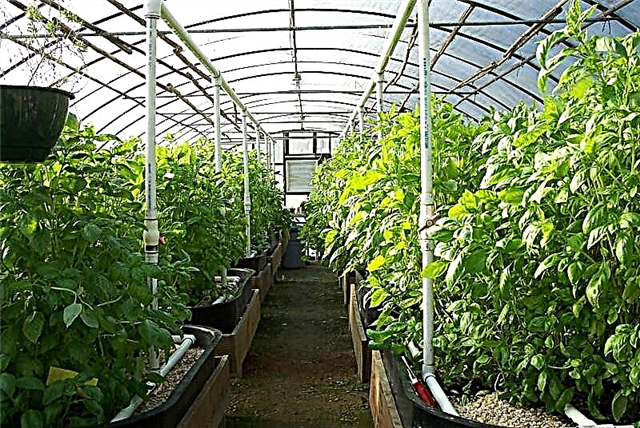
As a source of heat for the room, furnace heating, electric energy, gas can be considered. The issue of effectiveness will depend on the regional location of the facility.

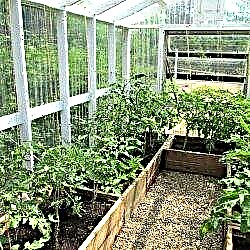
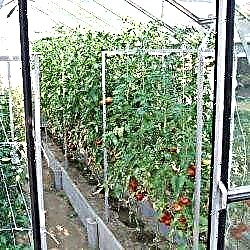

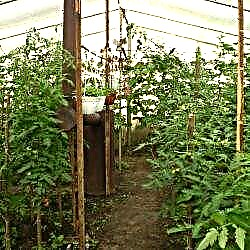
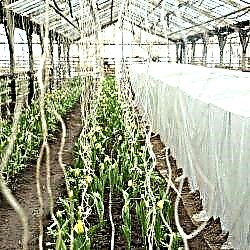
For productive work, it is advisable to bring water into the premises of the greenhouse. To do this, usually use a plastic pipe with a diameter of 1.5 inches. The riser is located at the entrance to the room.
Stage 8
Now cover the frame with a dense plastic wrap. It is attached using special brackets (you can use a wooden rail, which more securely fastens the film, not allowing it to tear).
Cover the frame with dense polyethylene. Photo from the site oteplicah.ru
Homemade frame made of polypropylene pipes
Polypropylene pipes are successfully used not only for laying water supply systems.They can be used to make homemade greenhouses covered with polycarbonate. This material in this purpose has the following advantages:
- pipes and components themselves are of low cost,
- it is possible to transfer the greenhouse to another place due to the low weight of the structure,
- simple installation, and for work a special welding soldering iron and scissors are required,
- polypropylene does not corrode, the greenhouse will last 20 years or more.
As for the cons, it is light weight. Such a greenhouse will have a strong windage. For this reason, it will be necessary to provide for proper and reinforced fastening to the foundation or ground.
So, to make such a greenhouse is not a big effort. All work consists of several successive stages:
- To begin, we do the markup.
- At the corners of the future greenhouse, reinforcement is hammered into the soil, while it should stick up to a height of up to 500 mm from the ground level.
- After the pipe is taken and one end is inserted into the reinforcement sticking out of the ground. She gently bends, and the other end is inserted into the opposite segment of the reinforcement.
By this principle, the entire frame of the greenhouse is assembled. When all trusses are installed, the crossbars are sure to be fixed. This will require special fittings: tees and crosses.
To mount the cross members, the following actions are performed:
- A pipe is cut in the upper part of the arch, later a cross or a tee will be soldered at the place of the cut.
- A plastic cross must be welded onto the cut parts of the pipe (help will be needed for this work: one holds the pipe, bending it, and the second solders it).
- In having 2 exits from the crosspiece, it will be necessary to solder the cross-members, thus, the whole structure will be interconnected.
- The end parts of the greenhouse are also cut, and tees are soldered.
Doors and windows can also be formed from polypropylene pipes. Watch interesting videos. One shows how to assemble such a greenhouse using self-tapping screws, and the second shows that everything is done using soldering. Polycarbonate is attached to such a greenhouse with self-tapping screws, which is very convenient and fast.
Key principles to consider when designing
If we consider the amount of solar energy that can be obtained, then the best option would be with a pitched roof, directed to the south. In this case, the sun will almost constantly shine on it at almost a right angle.
The north wall is being built opaque. Also, it must be insulated from the inside with a foil insulation - foil inside. With such a construction, heat and light entering the greenhouse will be reflected from the foil and at a right angle will fall on the beds. Since we know from the course of physics that the angle of incidence is equal to the angle of reflection.
Attention: you can not make a roof with a slope of less than thirty degrees. Snow can accumulate in winter, and this is undesirable for obvious reasons.
What do we get? The advantages of this solution are durability, wear resistance and good thermal insulation. The main drawback is the amount you have to spend on the purchase of such a greenhouse. The price of 1 square meter starts from 2500 rubles, if you plan a large area, you will end up with a substantial amount.
Materials for the frame
There are three main groups of materials from which the frame of the greenhouse is made:
Of wood, a rectangular and square beam is most often used. At its average cost, it is highly manufacturable - working with such material using ordinary home tools is very simple. With proper assembly and use of struts, struts and jibs, the frame of the beam is very strong and reliable.
Important! The main enemies of wood are mold and rot. This problem is solved by two measures. The first is the selection of a quality larch beam, a tree species that is most resistant to decay.The second is the processing of blanks for the frame with 2-3 layers of antiseptic impregnation.
When choosing a beam for the frame of the greenhouse, be sure to pay attention to the following things.
- Humidity - the wood must be properly dried, otherwise the frame of the greenhouse after construction will cause serious shrinkage.
- The presence of a large number of knots is undesirable.
- Wood fibers should not have serious defects.
- Separate foci of mold are not allowed.
- The bar for the frame of the greenhouse should correspond in size and straightness.
Due to the peculiarities of the material and the fact that the creation of bent parts from wood with your own hands is a complex and time-consuming process with a high percentage of marriage, the beam is rarely used to create arched or lancet greenhouses. At the same time, it is great for buildings of a classical form.
The next material for the greenhouse frame is metal. It is represented by many types of steel and aluminum profiles. The most popular is the profiled pipe with a cross section of 20x20 mm or more. With a comparatively light weight and low cost, it is characterized by high strength. In addition, in the presence of high-quality zinc coating or powder coating, the profiled pipe has durability and resistance to corrosion. The fasteners of the frame elements from this material are made using self-tapping screws, welding, nuts with bolts and special connectors of the "crab" type.
Important! The manufacture of bent frame parts for an arched greenhouse from a profiled pipe is possible with a home-made machine, which is easy to assemble.
In addition, from metal products, a corner, a ceiling profile for drywall and a W-shaped roof profile are very popular. They are even easier and more convenient to process, but the reverse side of this advantage is less strength and low resistance of the finished structure to snow load.
And the last group of materials for the manufacture of the frame of greenhouses is polyvinyl chloride pipes and profiles. They are quite flexible and cheap, they are convenient in operation, storage and transportation. PVC frame is suitable for a light summer small-area greenhouse.
Greenhouse polycarbonate fastening - technology
So, the features of manufacturing the foundation and frame of the greenhouse were considered. As you can see, there are many technologies that differ in complexity of execution, cost of raw materials and not only. Now we have come to the next stage in the production of the greenhouse - the installation / fastening of polycarbonate. To begin, we discuss the options for mounting material.
Conventional self-tapping screws will not work here. On sale there are special thermowells that do not damage polycarbonate, but rather, reliably hold the material. Special sealing washers are used. They have such positive aspects:
- The ability to easily attach polycarbonate to any type of crate.
- Moisture and cold air will not penetrate through the bolts, since their device involves the use of a special rubber gasket.
- A heat washer in extreme heat allows polycarbonate to expand without destroying it.
Neoprene material is used as a sealant. It is quite soft. If the temperature regime changes, then the maximum that occurs with neoprene is compression, but it does not lose its tightness. That is, the polycarbonate sheet will move, but in no case warp. As for the self-tapping screw, it is a type of "bug", that is, the tip of the self-tapping screw resembles a drill. After tightening the screw, the cap is closed with a plastic plug that gives an aesthetic appearance. Plus, the self-tapping screw will be protected from direct moisture, which eliminates its corrosion.
There are also special profiles for fastening polycarbonate.They can be of different types, for example, H-shaped, ridge - RP, one-piece connecting - НР and detachable - НСР, end - UP, detachable connecting - SP, wall-mounted - FP.
An aluminum fastening system is also known. Of course, in favor of this technology is the high strength and durability of the entire structure of the greenhouse. The aluminum fastening profile is available in lengths of 6 m and a thickness of 6 to 25 mm.
Do-it-yourself greenhouse cladding
From above, the frame of the greenhouse is covered with transparent material that transmits a significant part of the sunlight.
As sheathing is used:
A few decades ago, glass was the main material used in the construction of greenhouses, greenhouses and greenhouses. It has high light transmission and does not react with chemical compounds. Also, glass is not susceptible to any corrosive effects and is characterized by high durability - the frame made of wood or metal will soon become worthless. But the last advantage is controversial - this material is also known for its fragility, and any stone or thick branch can turn durable glass into a bunch of sharp fragments. Therefore, in recent decades, it has been superseded by transparent polymers.
One of the representatives of such materials is a plastic film. If you were looking for something very cheap to cover the frame for one season, film is your choice. But keep in mind that the material is short-lived and fragile.
Important! There are certain types of plastic film with reinforcement. It gives the material strength, increases its service life and resistance to wind.
The third material for covering the greenhouse is cellular polycarbonate. This is a relatively inexpensive material with high impact strength - in a situation where the glass breaks, the polycarbonate will only crumple or receive several small cracks. In addition, it is lightweight and very flexible, and therefore ideal for greenhouses with rounded frame elements. The presence of honeycombs filled with air gives polycarbonate the best thermal insulation among all materials for lining.
As for the shortcomings, they are as follows:
- the gradual destruction of material under the sun,
- the need to take into account during installation significant expansion of polycarbonate during heating,
- Without end protection, the polycarbonate cells will quickly fill up with dirt, condensate and mold, the material will bloom and become unusable.
To create a greenhouse with your own hands, it is important to choose the right polycarbonate. An important criterion in choosing should be the manufacturer. Do not chase the cheapness and buy Chinese materials. Verified quality manufacturer of polycarbonate in the domestic market - the company Kinplast. Several grades of cellular polycarbonate are offered in its assortment: WOGGEL - a premium material created in collaboration with European colleagues, SKYGLASS - represents the ideal price-quality ratio, AgroTITAN and polycarbonate SPECIAL FOR GREENHOUSES - designed to create greenhouses and greenhouses, contributes to the creation of an optimal microclimate for plants, at an affordable price.
Do-it-yourself greenhouse with a solid wall and heat storage
Winter greenhouses with the possibility of growing seedlings, vegetables and berries even in the cold have been known to gardeners for a very long time. But they have one significant drawback - high heating costs. How to solve this problem? Firstly, it is necessary to limit the loss of such valuable heat. To do this, in the greenhouse below, the northern half is allocated as an utility room, and between it and the beds is a capital wall covered with mineral wool. In addition, the building is equipped with a heat accumulator.
This battery is a network of fairly thick pipes laid underground and having exits to the outside.During the day, sunlight warms up the soil in the greenhouse, which does the same with the air in the pipes. At night, the temperature in the greenhouse decreases. Warm air, obeying the laws of physics, rushes up, cold air - down into the pipes. There it warms up from the soil, the cycle repeats, the circulation of air masses begins, the temperature in the greenhouse remains within the limits suitable for seedlings and plants.
Consider the construction of such a structure in the form of step-by-step instructions.
Step 1. A site is selected, measurements and demarcations are made. A pit breaks out from 30 to 70 cm deep, its walls and bottom are leveled. To speed up the process when building a large greenhouse, it is advisable to use special equipment.
Step 2 At the edges of the pit, formwork is being constructed for the strip foundation.
Step 3 Concrete is poured inside the formwork, a strip foundation is created.
Step 4 The bottom of the pit inside the perimeter is covered by thermal insulation.
Step 5 Horizontal pipelines are laid on top of the insulation to ensure air circulation.
Step 6 The ends of the ducts are arranged, everything inside the foundation is covered with earth.
Step 7 The frame of the northern and side walls of the greenhouse is being constructed. Instead of wood, you can use brick or concrete blocks.
Step 8 The central supports and the ridge beam are installed.
Step 9 The rafters are mounted on the north side of the building. This part together with the canopy will be used for household needs. If desired, you can adapt the entire room for growing plants, but then it should have a gable roof.
Step 10 The roof on the north side is covered with corrugated board. Fasteners are made using roofing screws.
Step 11 A wall frame is being constructed on the south side. Vertical racks and a beam of the upper trim are installed. The wall dividing the building on two sides is sheathed with wooden shields.
Step 12 The rafters are mounted on the south side of the building.
Step 13 The south wall and the side of the roof are sheathed with thick plastic wrap. Instead of a film, cellular polycarbonate can also be used, since it is a more durable material. Wooden shields also cover the side walls of the greenhouse.
Step 14 Capital walls in the greenhouse are sheathed with mineral wool slabs. It will reduce heat loss inside the structure.
Step 15 The interior decoration of the walls, painting of the frame elements is carried out. You can build shelving and bring seedlings, for which the best conditions will be created.
We hope that the above descriptions, recommendations and instructions will help you create an effective and durable greenhouse for your summer cottage or garden.
Polycarbonate
Cellular polycarbonate quickly gained popularity after the appearance, due to the combination of its beneficial properties. Even when used in one layer, good thermal insulation is ensured due to cavities inside. Air is one of the best heat insulators.
Polycarbonate is almost 15 times lighter than glass, this practically allows you to remove the issue of structural strength.
This material is easy to bend and give the desired shape. Polycarbonate can be used together with the frame in the form of an arch, without any difficulties and problems. By the way, this design removes the issue of snow, the arch does not delay the snow and it does not accumulate. Simple fastening, self-tapping to metal construction, and ease of handling.
Are there any recommendations or instructions for building greenhouses using polycarbonate? A lot of schemes are on the Internet, and they are easy to find.
The most simple recommendations are possible due to the characteristics of polycarbonate and the type of metal construction. The most durable frames are obtained from shaped pipes. The arch is formed using a pipe bender, the structure is assembled by welding. The cross section of the pipe for the arch is 20 * 40 mm, corner posts are made of pipes with a diameter of at least 40 * 40 mm.
Necessarily need ventilation windows, they will help plants survive sunny days. Greenhouse using prof. pipes with a pitched roof - just assembled using bolts. Slopes at the corner posts are needed only during the assembly of the structure, in the future, polycarbonate will give rigidity.
The galvanized profile, which is used when working with drywall, is even cheaper and easier to manufacture, but it is not so resistant to lateral loads (in wind). When using it, you need to make a roof slope of 45 degrees, even minimal snow accumulations are undesirable.
From the end, polycarbonate sheets with open honeycombs must be drowned out using special strips or sealant. So, we will reduce heat loss due to convective flows inside the cells.
Heating
How to start heating inside the greenhouse yourself? Consider the most affordable solution options for small greenhouses. We will consider only air heating, because the use of radiators, their installation, pipe wiring, all this will be expensive. And there is a high probability of freezing this system in the winter.
Heating using a gas main, how to do it right? A simple solution - a convector, how many will be needed, will depend on the area of the greenhouse. The thermostats that are used in the design of this device allow you to get the result without adjusting the burners and other issues.
The combustion products will go out into the open air through the pipe, and air will also flow through it to maintain combustion.
If the size of the greenhouse is large, you can install a gas boiler. The heat exchanger can be blown with a fan, if you need warm air dissipated using aluminum hoses. Thermal insulation as when using a boiler for heating a house is not needed, we have one room.
How to build a greenhouse for the winter season yourself?
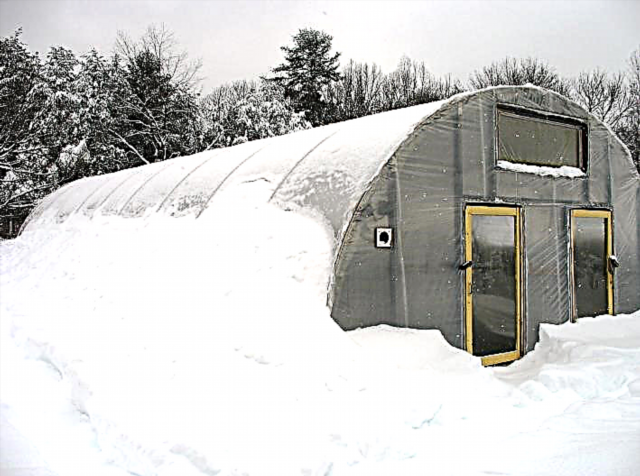
With the onset of cold weather, work in the garden and in the garden is coming to an end. And summer residents with regret have to leave their plots. Despite the fact that the cultivation of fruits and vegetables by the end of the season only becomes interesting. But if you build a greenhouse with heating on your summer cottage, you can grow anything you like even in winter in extreme cold.
Type of construction
First you need to choose the type of greenhouse, and only then proceed with the calculations and construction. Choices depend on the purpose of the site and its features, on location. Inveterate gardeners recommend structures using polycarbonate as a material. This is the easiest and most popular option. Another good option is a greenhouse thermos. It is erected in late spring or summer, because you need to have time to prepare the soil for planting. Polycarbonate structures can be made at any time of the year. This material is very popular because it has a number of useful qualities, in terms of greenhouses.
With a small thickness, polycarbonate in winter creates the necessary thermal insulation. It has a honeycomb structure, and the honeycomb is filled with air which has the best thermal insulation properties.
The weight of polycarbonate is 15 times less than glass, so a reinforced frame is not needed. It is very easy to make an arch structure from this material, it is easily bent.
Paperwork
If the greenhouse for the winter period is on your own site and you do not want to create large-scale production, and accordingly use the labor of wage workers and sell products of legal entities. persons, paperwork is not necessary. For sale on the market, you only need help that you grow them on your own site.
The owner of a large greenhouse farm using hired labor, the crop of which is sold through shops and cafes, restaurants, needs to get a legal entity. You can also arrange an individual entrepreneur or a private agricultural enterprise.This will allow you to achieve tax benefits, although all this is complicated.
Where to build?
The greenhouse must be placed so that most of the sun's rays come to it. It is necessary to ensure that the shadow from the house, buildings and trees does not fall on it. The sides of the greenhouse should be oriented north and south. Consider also that the wind significantly increases the heat loss of the structure.
By placing the greenhouse in the wrong place, you will get the exact opposite effect from the expected - in the form of large heating bills and poor growth of vegetables and fruits that you grow in it. When building a winter greenhouse with your own hands: coating materials, types of heating, location on the site and type of construction, you need to choose based on what plant culture you will grow. An important fact is the financial opportunities that need to be considered.
Features of the building
Many gardeners, amateurs, for the first time faced with this issue, think what are the differences between an ordinary greenhouse and a winter greenhouse. And the differences are significant.
Before you start building a winter greenhouse, you need to carefully familiarize yourself with all the important points and its features. Temporary structures are mounted from separate frames. Since the weight of this design is small, it does not need a foundation. Greenhouses using polycarbonate as a coating can be mounted on posts made of ordinary brick.
Winter greenhouse - a solid building. It has electricity, heating. The rigid and heavy frame allows you not to worry about the loads arising from wind and snow. But for her it is necessary to make a solid foundation.
An ordinary greenhouse can be small in size. It all depends on how many and what crops you will breed in it. The cultivation of vegetables in the winter in most cases occurs for further sale, therefore the requirements for the area of the greenhouse are completely different, they start from tens of square meters.
The material for covering this structure can be absolutely any. But the best, affordable and reliable will be polycarbonate.
Before proceeding with the construction of a winter greenhouse, it is necessary to provide options for severe frosts and, as a consequence, the need for additional thermal insulation.
DIY greenhouse construction scheme
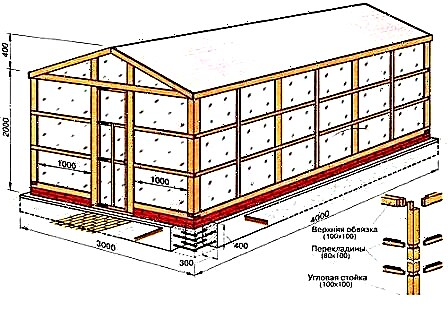
The location of the greenhouse must be chosen very carefully, because this is a major construction for more than one year. It is good if it is a flat area, well-lit and without buildings nearby. Still need to take into account the humidity of the land on which the building will be, it should be within normal limits.
The foundation for the greenhouse can be made using a reinforced concrete tape finely buried. Since the foundation must be thorough, not for one year, when pouring it, you need to do everything in accordance with the requirements.
When the base is ready, the frame of the structure can be assembled on it. Structures manufactured at the factory are usually provided with drawings and photographs which will greatly help during installation. With rubber washers, polycarbonate sheets are attached to the frame. For tightness, their edges can be sealed with tape. To ensure the flow of fresh air into the greenhouses, several windows are made. If you have a desire to grow vegetables, but you do not know how to build a winter greenhouse yourself, you need to contact specialists or buy a factory-made construction.
Type of heating
The type of heating used must be selected based on the usable area of the greenhouse. Small spaces can be provided with heat using a stove. If the areas are large, then you need to choose from:
- Water heating.
- Electric heating.
- Biofuel.
To use water heating, pipes, a tank and most importantly a boiler will be needed. Pipes can be buried in the ground or placed directly under the shelves.
Electric heating can be air or underfloor heating.Infrared heating is also used very often. The “underfloor heating” system is similar in principle to the water system in terms of design. In a small recess mount a system that consists of heating cables. And then it is covered with layers of sand and fertilized soil. Air heating can be arranged using fan heaters. Infrared heating is provided by infrared heaters located on the ceiling.
Biofuels are the cheapest way to heat.
Biofuels can be: manure of any cattle or horses, heating wood and bark, hay or straw.
Biofuel is located under a layer of fertile soil. For the correct heating of this type of heating, it is necessary that there is a constant flow of air and the necessary level of moisture in the air is maintained.
Which type of heating to use in your greenhouse is up to you to decide. Each of the options should be considered from a financial point of view. How you build a winter greenhouse for growing plants you now know. You need to figure out how to place everything in it correctly - the layout of the internal space.
How to arrange the beds?
If you grow plants of the same species in the greenhouse, you can arrange the beds in parallel. Consider different cultures may not get along next to each other. For their joint breeding, it is necessary to apply separation into separate zones. For example, growing tomatoes and cucumbers nearby will not work, because they need different methods of watering - tomatoes need to be watered directly under the root, and a drip irrigation system is suitable for cucumbers.
Sales market
Grocery chains and small shops, and even supermarkets. They sell a very large volume of vegetables every day, so entering into supply contracts with them is very beneficial for you as a farmer. But it will be necessary to register a legal entity, and these are costs that need to be taken into account. Although if the crop that turns out to be grown is large, you can think about this market. The market, all beginner gardeners sell greens and vegetables here. Rent a kiosk or tent, or a place, and you can start trading in your crops.
Selling greens and vegetables directly. You can place ads on highly specialized sites, forums, message boards in the global network. And buyers will be found very soon.
Types of Greenhouses
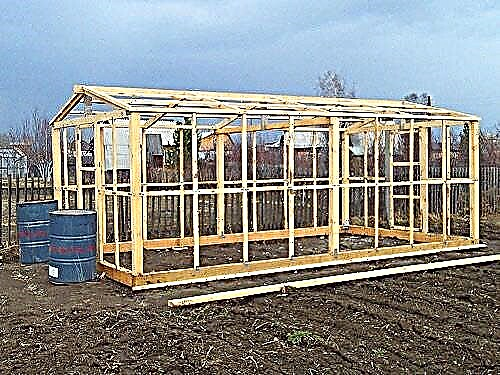
One of the easiest and easiest to install and assemble is a greenhouse using a wooden frame, which is covered with a plastic film, a special greenhouse. The main advantage of this structure is the availability of materials, speed and ease of installation. Cons fragility of the coating, which can be easily damaged.
Another design came to us from the Soviet greenhouse farms. Glass is used as a coating material. Its plus is the possibility of operation all year round, if you bring heating and make double frames for the winter period. Light transmittance is ideal compared to any other material. Cons is a complex construction, and the fragility of glass as a material.
The type of greenhouse that you should pay attention to is the growing popularity of buildings with a coating of cellular polycarbonate. The advantages include a long service life, low weight, large temperature range, excellent parameters of rigidity and strength. Of the minuses, compared with glass, light transmission is about 90 percent.
For the installation of a polycarbonate greenhouse, special attention must be paid to the foundation. How to make a foundation? It is necessary to dig a small ditch whose approximate depth is from 10 to 30 cm, and the length and width are considered based on the required area. The base must be protected from moisture - put waterproofing, it can be roofing material. If there is a strip foundation, then it is necessary to put the formwork from any materials remaining on the garden plot.The fittings can be replaced with any other metal, they will do, and the remains of old pipes and pieces of steel wire.
Since the length of the brick is 25 cm, the width of the brick foundation will be the same.
The height of the foundation will be about 20 cm above ground level. The height of the foundation will need to be increased if you use high beds. It recommends an increase of up to 50 cm. Thus, a small wall will be obtained. The entrance door will be installed in it.
We figured out the foundation. Now you need to make a choice between finished material or draft.
Draft greenhouse
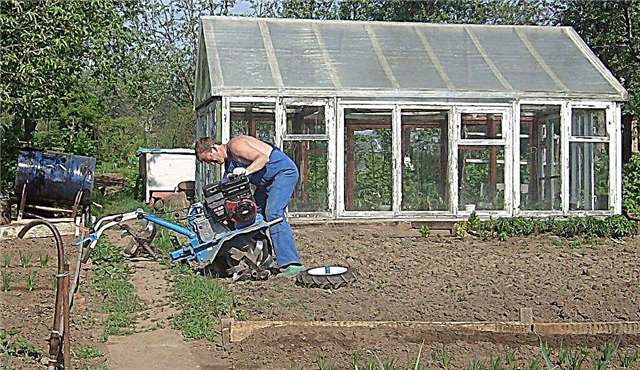
What is the rough stuff? These are various types of metal for the frame, polycarbonate, gaskets, etc. The greenhouse from such materials can only be of a certain shape, since they narrow the list of shape selection. At first glance, it will be on a small house with a transparent roof and walls. This is due to the fact that in a house without certain skills and the necessary equipment, it is difficult to make arcs from the power frame.
In a greenhouse made of this type of material, there is a plus - it is the cost-effectiveness of construction. There is no need to draw a project, you do not need to buy material and tools for installation, and you can also install a greenhouse yourself without hiring contractors. For the construction you will need from tools: a drill, a hammer, screwdrivers and a hacksaw for working on metal.
On the sheet you make a drawing with the dimensions of your building in order to have an idea of the general view of the greenhouse. GOST standards do not need to be respected, you have enough of your drawing. The most important thing is that you yourself would understand what to do and in what sizes.
Recommendations for installing this type of greenhouse are impractical, since each gardener has different types of plot. And everyone will adapt to their layout, and take into account all the moments and features of their site when designing a greenhouse. The material from which you decide to build a greenhouse also matters during the manufacture.
Features of polycarbonate installation
In fact, it absolutely does not play any role in what position the polycarbonate sheet will be located, vertically, at an angle, horizontally, etc. Special attention should be paid to sealing joints. If an aluminum profile is used for fastening, then it has a special sealing gum. Polycarbonate sheets are joined together, forming a tight connection.
When screwing the screw through polycarbonate, do not tighten it strongly. The gum should press the sheet slightly against the frame. Special attention must be paid to the edges and ends of polycarbonate. They should be framed with a special protective plastic profile.
If after cutting a sheet you find burrs, uneven and very rough edges, then all this must be removed. Otherwise, it will not be possible to provide sufficient sealing. In addition, we suggest watching video materials, which clearly show the process of attaching polycarbonate to the greenhouse.
Polycarbonate greenhouse communications
To build a greenhouse is one thing, it’s quite another to equip it with the necessary communications. Among the main ones, the following can be distinguished:
This is especially important if you plan to grow vegetables all year round. If your work will be connected with this, then it is worth considering to automate most processes. This will significantly save your time, although at first you will have to attract considerable funds. We recommend that you watch the videos in these subsections. We are confident that this information will help you make the right decision.
Artificial lighting as a complement to natural
We already said at the beginning of this article that the correct location of the greenhouse will save you money. If the chosen place is well lit by the sun, then this is a huge plus.However, some cultures are sensitive even to a small lack of light, and this can cause negative consequences that affect their development.
For the organization of lighting use lamps:
- ordinary glow
- high pressure mercury
- high pressure sodium
- fluorescent
- halogen
- LED light.
Consider the features of these types of lamps in the context of their use for lighting in a polycarbonate greenhouse:
| Types of lamps | Specifications |
| Incandescent lamps | This type of lighting gives an excess of rays. This has a bad effect on the development of plants, so their installation will not ensure the achievement of the original task. |
| Mercury | This type of lamp in addition to lighting gives heat. However, their main disadvantage is ultraviolet radiation. Their use is allowed in combination with other types of lighting. |
| Sodium | High light output. The light emanating from them has a yellow-orange hue. This is excellent for the development and fruiting of all plants in a greenhouse. |
| Fluorescent | This type of lamp is considered the most effective. The light emitted by them favorably affects the development of plants. The low temperature that they radiate allows them to be located in close proximity to plants. In addition, you can use ultraviolet lamps that will not allow bacteria and other harmful microorganisms to develop. |
| Halogen | High cost and short life are serious drawbacks. However, the emitted light most accurately repeats the spectrum of sunlight. |
| LEDs | The radiation takes on shades of blue and red spectrum. They are very popular due to their economy. It is recommended to use white LEDs in the greenhouse. |
The intricacies of organizing wiring in a greenhouse
When conducting electrical cables in a greenhouse, it is important to consider one characteristic feature. There is always high humidity in the greenhouse. Therefore, the wires should be reliably protected from moisture. This also applies to the watering process. Therefore, the wires should be laid in special boxes. It is worth fixing it, the higher it is from the ground, on the ceiling and walls.
In order to make the development of plants more beneficial, the lighting process inside the greenhouse can be automated. At first, this will entail waste, but subsequently you will experience significant savings.
Heating is inextricably linked with lighting.
Greenhouse heating is directly related to lighting. Therefore, if you decide to carry out the necessary communications, then heating should be in the foreground. Today, several heating techniques are known. For example, stove heating. For implementation it is required to build a special vestibule in the greenhouse. The main disadvantage is the low efficiency and the complexity of the heating process. As for modern technology, water heating and electric should be included here. It is distinguished by its high efficiency. Plus, it’s quite possible to automate the process using special automation.
There is an interesting technology for heating the soil, this is a kind of "warm floors". Soil is an excellent heat conductor, therefore this technology is in great demand, but requires considerable financial investments. We have prepared several videos on the effectiveness of a particular heating method in a greenhouse.
Ventilation - automatic and manual
Ventilation also affects crop yields. Today, several methods are known for organizing ventilation in a polycarbonate greenhouse. The simplest is mechanical, that is, manual. For this, the frame provides for the presence of window leaves (small windows). If necessary, the windows open to allow air to change. Aeration windows can be located at the end of the greenhouse. If the greenhouse has large dimensions, then there may be several such windows.In principle, this method is suitable for summer residents who live in the country during the cultivation of a particular crop.
If your financial capabilities allow, it is quite realistic to build an automatic ventilation system. It is of several types:
- Electric.
- Biometric
- Hydraulic
Consider the features of each of them.
| Type of automatic ventilation | Features and differences |
| Electric | This method of greenhouse ventilation is considered the cheapest. For its implementation requires an electric fan and thermal relay. The key link in the entire circuit will be the thermal relay. It will signal the fan to turn on / off the fan. One of the advantages is that you can install several fans and a thermal relay along the entire length of the greenhouse. To increase the efficiency of such a system, it is recommended to install window panes at different ends of the greenhouse, which will open when the fan is turned on. A significant minus is the volatility. When the power is turned off, ventilation will not work. |
| Hydraulic | This type of ventilation is considered the most effective, reliable and durable. This system consists of levers that are interconnected by a transom. The principle of operation is as follows: water is poured into the tank. When the water is heated, expansion occurs, while cooling - compression. When the expansion of the liquid occurs, the windows open, respectively, in the reverse order when the water is compressed, the windows close. A vessel installed inside the greenhouse can be used as a thermometer. The tank fixed on the outside is a compensator. Hydraulic hoses are used to communicate with each other. Everything is relatively simple. You can watch the video at the end of this section. |
| Biometric | In this system, the device and operation of automatic ventilation is possible due to the increase in material with increasing temperature. To implement such a project, two metals with different expansion coefficients are used. As a result, such a system has a low cost, is easy to install, but has a long service life. |
Watering is water, the source of life
Another important communication is watering. The method of watering depends on the crop grown. For example, tomatoes should not be watered from above, water should immediately enter the root system. Especially plants need watering in the summer. With all this, when organizing watering, you should avoid excess water and its lack, adhering to the middle ground.
This can be achieved through the manufacture of an irrigation system, which can be of such a plan:
- sprinkler system
- subsoil irrigation,
- drip irrigation.
Consider the features of each of them.
Sprinkler system. The easiest way is considered to be just such an irrigation method, where water flows from above. It is implemented using a shower spray. There is also a fountain spray. In this case, water is sprayed using a rotating spray head. Among the positive aspects of such irrigation can be identified:
- increase in humidity in the greenhouse,
- imitation of rain watering,
- high performance
- uniform watering of plants.
Intrasoil irrigation. With this watering, the roots immediately feed on moisture. The soil is equipped with channels through which water flows. It is evenly distributed over the root system of certain plants. Plastic pipes can also be laid to a depth of 350 mm. A plastic film spreads at the bottom, after a perforated pipe and from above all this is covered with soil.
Among the positive aspects of this kind of irrigation can be identified:
- a significant slowdown in weed growth,
- slightly moistened topsoil,
- regular nourishment of the plant root system with moisture.
Drip irrigation. Well, the last watering method is drip.Based on its name, it becomes clear that water is supplied with drops. At the same time, she immediately goes to the roots. This solution has a number of positive aspects, for example, water is rationally used, the formation of fungal diseases and so on is excluded.
Each of the described irrigation systems has its own characteristics, and all of them can be automated. It will be necessary to purchase sensors and all kinds of automation.
Video: watering a greenhouse, how best to do
So, the question of how to make a polycarbonate greenhouse on your own was examined in detail. If you want to add something, you can leave comments and comments on this article. In addition to everything, we offer a series of photographs of ready-made greenhouses. Perhaps they will come in handy when building your own polycarbonate greenhouse.
Ready-made greenhouse
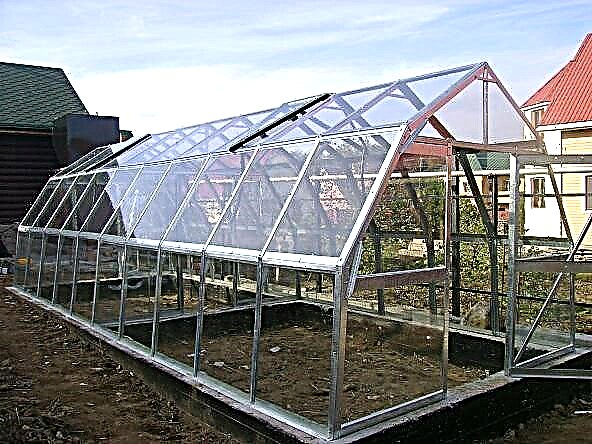
Positive characteristics of this type of greenhouse:
- Saving your time. Since the manufacturer himself calculated everything and did the design work.
- The kit contains all the materials for installation. There is no need to search for materials.
- The ready-made kit already has a scheme for collecting the greenhouse. Having carefully studied it, you can easily assemble it yourself.
- All elements have a specific size, as they were manufactured at the factory.
The negative point is that they are of the same type. Arches in the form of a tunnel (arched type) are now on the market. The advantage of this design is that due to its arched shape, it has a large light reflection. Also, water from rain will not accumulate on such a surface. The downside is that it is less durable and tough.
Complexity in the assembly should not arise. We get the circuit, look at the drawing and, clearly following the instructions, assemble the structure, almost like an assembly of a constructor.
Work with covering material
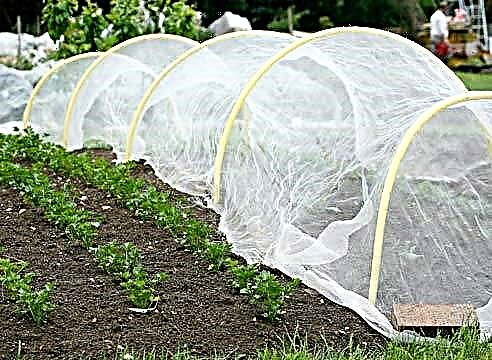
Since it is quite soft, caution is required when working with it. And also during the assembly process, it will be necessary to cut and drill the material. The main thing here is to prepare in advance by marking with a construction marker.
When cutting material, we recommend using a clerical knife, approximately 3 knife segments long, so that the knife does not go to the side.
Since polycarbonate is a finished construction, it has ribs of stiffness inside. Therefore, cutting can be difficult. The main thing here is experience. For starters, you can take a small piece of polycarbonate and work with it, so to speak, to feel the material. And if you have a jigsaw, then, of course, use it.
Another important point in the assembly. The set has a steam pass tape. Be sure to use it. It will protect your greenhouse from excess moisture and dirt.
So, we have examined several types of greenhouses. Each of them has its own special and distinctive characteristics. And when building a greenhouse with your own hands, the best projects for yourself will be exactly those that will allow you to focus on your goals, task and opportunities. After all, it does not matter what you have, the most important thing is that it is made with your own hands and will delight you and your loved ones with a wonderful harvest.
For greater ease of understanding about the construction of the greenhouse, we advise you to watch the video on our website - the greenhouse with your own hands and everything connected with it during its design.